Friday, September 30, 2016

Bag Making Inspiration

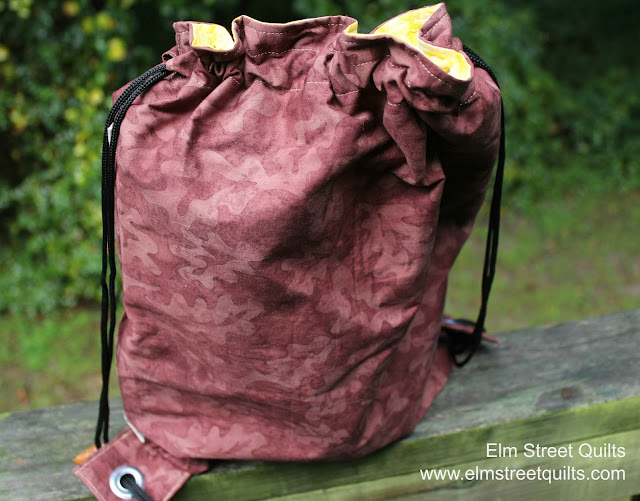
Elm Street Quilts Drawstring Backpack

Two weeks into the Bag It event and I'm having a great time.  I hope you are too!

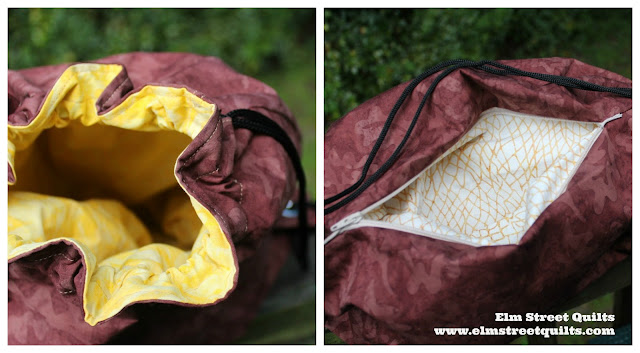
Just finished up another Drawstring Backpack using some yummy Island Batiks!  It was fun to choose contrasting fabric for the lining and the hidden zip pocket.

Elm Street Quilts Drawstring Backpack

I love tutorials - to read them and to write them.  But sometimes I want to download instructions that I can print and / or save for easy access on my ipad or computer.  I'm pleased to announced that two of the Elm Street Quilts Bags - The Purse Pack and the Drawstring Backpack - are also available from my Craftsy store for a small fee.

The tutorial for the Drawstring Backpack with a twist will be available mid-November.  But you can get started now with the pattern.  The twist is the hidden zip pocket tucked into the side seam.  So handy!


The Purse Pack tutorial published earlier this month and is also available as a pattern.  These go together quickly and make great gifts - it may just be a pattern you want to refer back to again and again!


Get your copy from my Craftsy store!   More will be released soon!

The Bag It event runs through mid-December but make sure you share bags now as you make them and earn entries.  There is a permanent linky party here plus the same linky will show up in blog posts to remind you.  Look at some of the great bags that have been linked up so far!

When you think up, you'll be asked to say how many bags are in the photo.  No need to take a photo of each bag individually.   Check it out and enter your bag!

What's up next week in the Elm Street Quilts Bag It event?

On Monday, the tutorial for the Sew Travel bag will be available and on Friday we'll focus on tutorials that other people have shared.  Have a bag tutorial?  Link it up here and earn extra entries! 


Have a wonderful day! Patty

Thursday, September 29, 2016

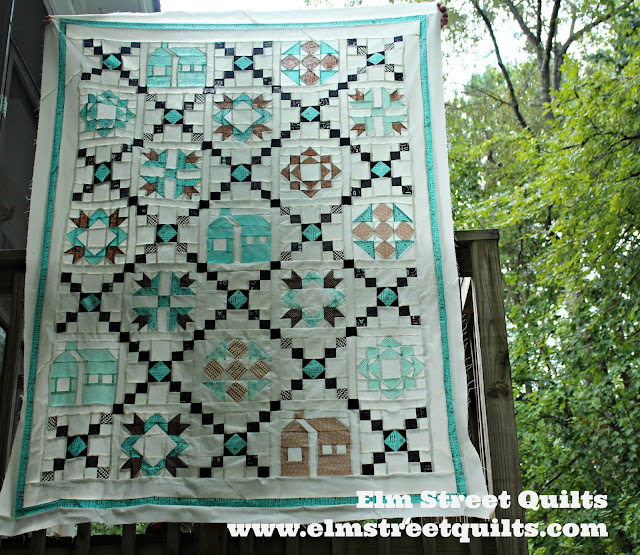
Crossroads quilt top is done!


Fat Quarter Shop Crossroads


This quilt is from Fat Quarter Shop and was this year's QAL.  It is called  Crossroads.  I made my blocks with a layer cake of Moda Elementary with just a little extra yardage.  The actual pattern involves about a bi-zillion HST for one of the borders.  I've not the time or the fabric to do that so simplified things a bit.  

Thanks to all the opinions and feedback from my prior post on this quilt.  I went with option 3 and I just love it!     

The quilt is 54 x 71 ''  and it will be a nice comfy couch sized quilt when I back it in flannel.  I'm hope to piece together the back from some large flannel scraps that I've got in the stash. ( I typically don't piece my backs together from random fabric so I'm working up to talking myself into it!)

Finishing my Crossroads quilt top was my OMG goal (post)  for September.  I'll be linking up here at Red Letter Quilts.


Have a wonderful day! Patty

Tuesday, September 27, 2016

Falling Maple Leafs

It's officially fall.  I've a reasonably large collection of fall themed quilt decorations but there is always room for one more.

Introducing my Falling Maple Leaves quilt, which finished at 24'' square.


The leaf blocks are all paper pieced and very fun to assemble.  They are twisting about in a light breeze on the quilt top.  To quilt, I outlined the leaves and then did an all over stipple FMQ.


I am so happy with it!

Want to make one too?  I've a pattern available in my pattern shop.


I'll be linking up with Mini's and more parade with Sheri and Michelle.  I'll also be linking up with Sew Cute Tuesdays, , Freemotion by the River,   WIP Wednesday's,  Let's Bee SocialMidweek Makers.  Fabric Frenzy FridayFinish it Up Friday and Finished or Not Friday.

Have a wonderful day! Patty

Monday, September 26, 2016

Bag It - Lunch Sack

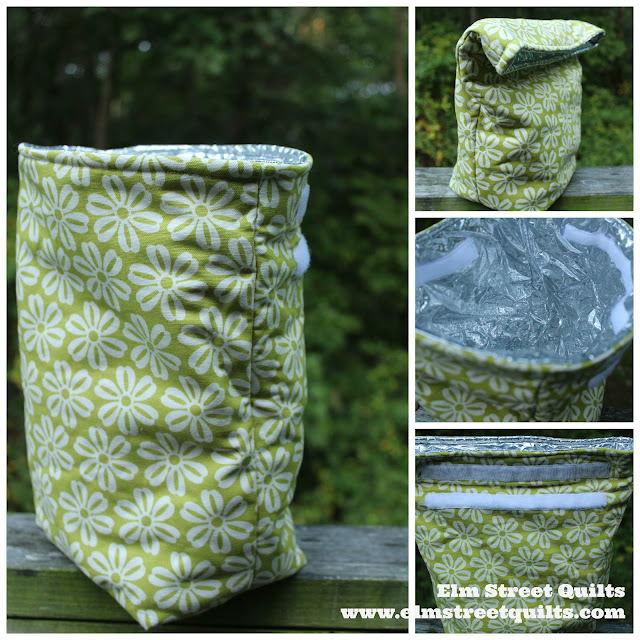
Elm Street Quilts Lunch Sack


My daughter and I enjoy a picnic each Sunday - rain or shine.  On nice days, we'll eat at a table by a lake and watch the ducks.  My new lunch sack brings an extra element of fun to our weekly picnic!


Supplies you will need - (supply source information)


# pieces
Dimensions (height x width)
  Primary fabric
Two (2)
15 x 12 ‘’
Insul Shine
Two (2)
15 x 12 ‘’
Fusible fleece
Two (2)
14 ½ x 11 ½ ‘’
Velcro (¾ ‘’)
One (1) each
One set each at 7 ‘’, 8’’
plus a spare 8’’ set to be used during assembly


 Note - for directional prints the measurements are listed as height by width.  So you'll need a piece 15' high by 12'' wide.

Insul Shine is a product from the Warm Company.  It is machine washable and designed to keep food warm or cold.  I used it as the lining of the bag.  I tested it by leaving ice inside and compared it to ice left in a typical cooler.  It performed well.


Assemble the lining

Center a seven (7) inch piece of Velcro on an Insul Shine piece, 1½ '' from the top and ½ '' from each side.  Repeat with other piece of Velcro and the second piece of insulate.


Elm Street Quilts Lunch Sack tutorial


In the process of making the bag, the Velcro does a great job of adhering itself together just when you don't want it to!   To prevent, take one of the spare pieces of Velcro and adhere to one of the pieces you just sewed.  Doesn't matter which one.  (You'll use the other spare piece of Velcro in a later step.)

Put shiny sides (i.e. the right side) together and sew around the two (2) sides and the bottom using a ¼ '' seam.  (Note - the top of the bag is where the Velcro was applied. )

Don't use pins - you can either just keep things aligned with your hands or use Clover Binding Clips.

Elm Street Quilts Lunch Sack tutorial

Mark a line ¼ '' from the stitching line in each of the corners you just sewed.

Elm Street Quilts Lunch Sack tutorial

Cut on these lines.

Elm Street Quilts Lunch Sack tutorial

Sew each corner to create the bottom of the bag.  (If needed, review this  tutorial on boxing corners.)


Turn your lining inside out and examine your seam lines to make sure everything is secure.  Your lining is now complete.


Assemble outer part of the bag

Iron fusible fleece to wrong side of primary fabric.

Pin the hook side of the Velcro 1 '' from the top, centered on the right side.  Align the loop tape below, centered, positioned 2 ¾ '' from the top.(There should be a 1 '' gap between the loop and hook tape.)

Sew to bag.  Use the second piece of spare Velcro and adhere to one of the pieces of Velro you just sewed to prevent these pieces from sticking to each other during assembly.

Elm Street Quilts Lunch Sack tutorial

Sew the long sides of the bag,  Sew across the bottom, leaving (roughly) a 4 ½ '' gap for turning.

Elm Street Quilts Lunch Sack tutorial

Box corners exactly as was done for Insul Shine lining.  Both the outside fabric bag and the Insul Shine fabric bag should be able to stand up on their own.

Elm Street Quilts Lunch Sack tutorial

Nest the Insul Shine lining bag inside the outside fabric bag.  Right sides should be together which means the shiny side should be touching the right side of your primary fabric.  Use Clover Binding clips - not pins - to secure.

Elm Street Quilts Lunch Sack tutorial

Sew all the way around carefully and slowly.

Elm Street Quilts Lunch Sack tutorial

Carefully turn inside out.   This is when you will be quite happy you had that spare piece of Velcro!

Elm Street Quilts Lunch Sack tutorial

Using Clover Binding clips to secure top edge and topstitch.

Elm Street Quilts Lunch Sack tutorial

In typical bag assembly with a lining, your gap is inside the bag in the lining.  This bag is different and the gap is now at the bottom of your bag.  Close this opening using tiny stitches.

Elm Street Quilts Lunch Sack tutorial

Fill your lunch sack and enjoy!!

Elm Street Quilts Lunch Sack tutorial


I'll be linking my Bag It tutorial with Sew Cute Tuesdays, , Freemotion by the River,   WIP Wednesday's,  Let's Bee SocialMidweek Makers.  Fabric Frenzy FridayFinish it Up Friday and Finished or Not Friday.   

Have a wonderful day! Patty

Friday, September 23, 2016

Bag It - Link Up

Elm Street Quilts Bag It linkup


Welcome to the first official link-up party post for Elm Street Quilts Bag It 2016!!  (This linky is also available from the Bag It entry page.)

I just can't wait to see what everyone links up!

Bags completed during the Elm Street Quilts Bag It event (September 19 through December 16, 2016) need to be shared  through any of the options listed below and then entered into the linky below.   The options for sharing are:


  • shared on Instagram tagged with #elmstreetquiltsBagIt

  • posted on your blog with links back to Elm Street Quilts

If you don't use Instagram, Facebook or have a blog, you can just upload the photo from your computer or  email  me ( elmstreetquilts at gmail dot com ) and I'll do it for you.  Linking from Flicr is fine as well.

Your photo can contain multiple bags - each bag counts as an unique entry.  (You'll record how many bags are in the photo during the link up!)


Please review Bag It Participant Guidelines before linking.


Thanks for linking up!  Share your own bag tutorial - earn more entries into the giveaway!


See overall schedule and links to all tutorials on the Bag It event page  
Make sure you visit the sponsor posts and earn entries into the giveaway.


Have a wonderful day! Patty

Wednesday, September 21, 2016

Calming Chaos - My Snowflake Shimmer Finish

Snowflake Shimmer QAL


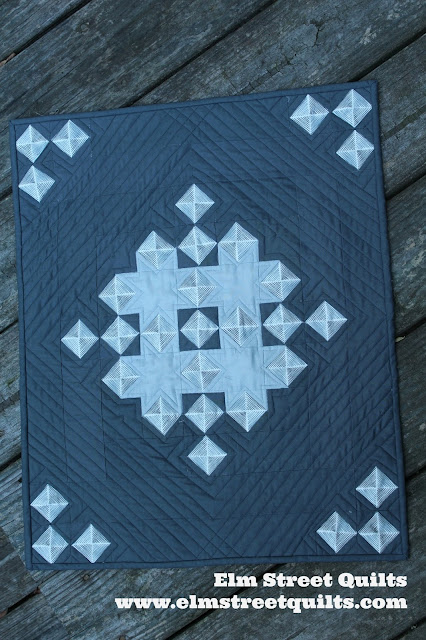
Yvonne @ Quilting Jetgirl ran a QAL for her Snowflake Shimmer quilt.  I did some 'fancy' fussy cutting for my square in square blocks. I also downsized the quilt - these square in square blocks are 2 1/2 '' unfinished and the overall quilt is 18 x 22 ''.


Perhaps not the best quilty metaphor here, but I think of this quilt as keeping all the craziness in the world in check - hence the quilt name Calming Chaos.  The gray surrounding each of the islands of chaos.

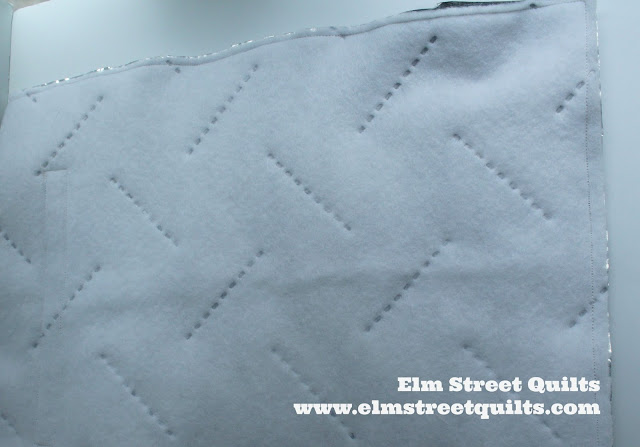
The quilting was a lot of fun.  I went with straight line quilting and echoed around the shapes.  I really liked the effect with the grid as lines intersected.

Snowflake Shimmer QAL

Snowflake Shimmer QAL


Thanks Yvonne for a fun QAL!

Make sure you check out my Elm Street Quilts Bag It event - fun way to earn chances to win prizes just for getting a head start on your holiday making!

I'll be linking up my finish here.  I'll also be linking up with Sew Cute Tuesdays, , Freemotion by the River,   WIP Wednesday's,  Let's Bee SocialMidweek Makers.  Fabric Frenzy FridayFinish it Up Friday and Finished or Not Friday.


Have a wonderful day! Patty

Tuesday, September 20, 2016

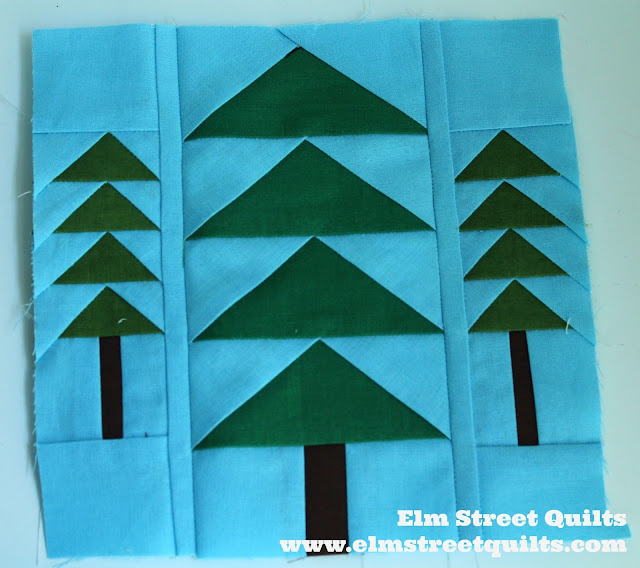
AMB Mystery Block 5 - Among the Trees

I had fun with this month's mystery block from American Made Brand's QAL called Our Land.

American Made Brand Mystery QAL block 5


I am resizing the blocks to be 6'' (finished) so drew this up as a paper piece block.  I changed the position of the side trees just a tad.  Enjoying this one even more than the cactus!

Here are my five blocks so far.

American Made Brand Mystery QAL

Blocks arrive the first Monday of the month.

It's not too late to join in the fun - you can find a link to each of the block patterns here on the Clothworks blog.

Have a wonderful day! Patty

Monday, September 19, 2016

Bag It - Purse Pack

Elm Street Quilts Purse Pack tutorial

These purse packs are quick to make and can be used many different ways.  You can easily carry along some tea bags, extra tissues or tuck away your credit cards and use this as a wallet.

I'll be making more of these for my holiday gifting!


Supplies you will need - (supply source information)

# pieces
Dimensions (height x width)
  Primary fabric
One (1)
5 x 7 ½ ‘’
Lining fabric
One (1)
5 x 7 ½ ‘’
Pocket fabric
Two (2)
5 x 7 ‘’
Fusible Fleece
One (1)
4 ½ x 7 ‘’
plus two scraps
each at 1 ½ ‘’ square
Fusible interfacing (medium weight)
Two (2)
5 x 7 ‘’
Pair of Hidden Magnetic Snaps
Two (2)
12 mm


Prepare primary fabric

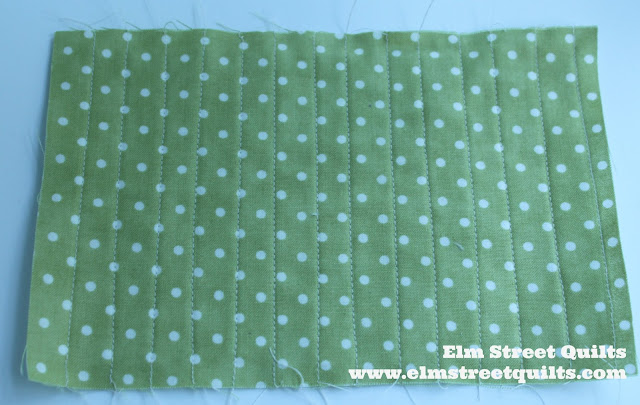
Adhere fusible fleece to wrong side of primary fabric.  The fleece is cut slightly smaller in order to reduce bulk.  Quilt as desired.  This sample has quilting lines roughly ½ '' apart.

Elm Street Quilts Purse Pack tutorial


Prepare magnetic snaps

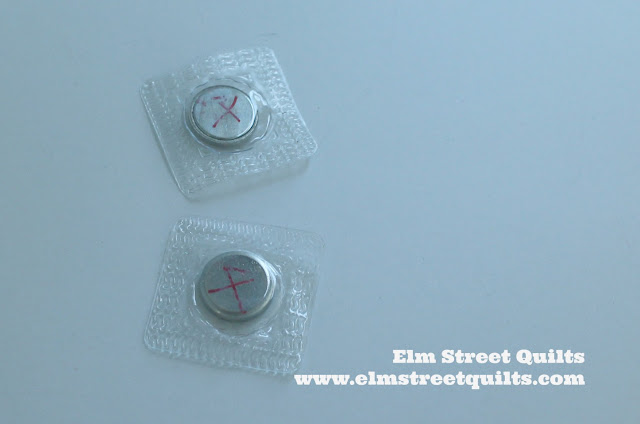
Magnets come with a north side and a south side and you'll need to determine which sides of the each magnet attracts to the other (vs repels.)  Place an X using a sharpie on the side of each hidden magnetic snaps that will attract.  Then test to make sure!

Elm Street Quilts Purse Pack tutorial


With the X side facing up, sew each hidden magnetic snap to a ½'' square of fusible fleece.  Trim off excess fleece to edge of plastic (see photo below on top right.)


Prepare pockets  

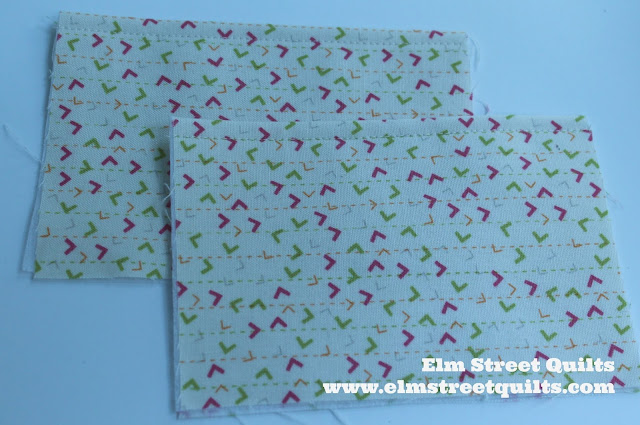
Iron fusible interfacing to wrong side of pocket fabric.  Repeat for other pocket.   Fold in half and press.  (Pocket will measure 3 ½ x 5 '' when folded.)   

On the fusible, draw a line ¼ '' from edge and mark center of this line, i.e. 2 ½ '' from each side.


Elm Street Quilts Purse Pack tutorial


Center prepared magnet on this mark, aligning edge to the  ¼ '' drawn line.  Fusible fleece side of the hidden magnetic snap unit is facing down, the X is facing up.

Sew to attach to pocket.


Elm Street Quilts Purse Pack tutorial

Refold pocket and sew a line of top stitching along folded edge.


Elm Street Quilts Purse Pack tutorial


Assemble Purse Pack

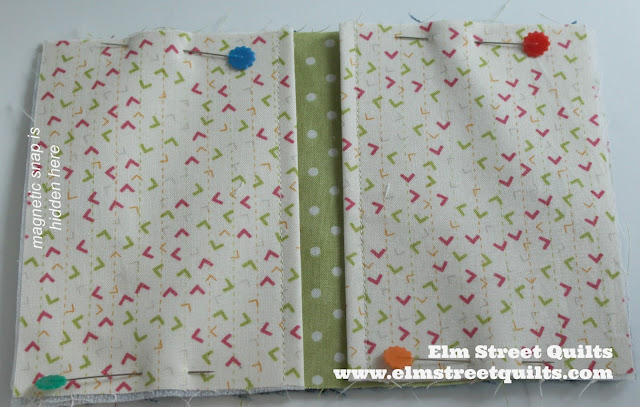
Place each pocket onto right side of lining fabric, making sure folded edge is towards center.  Flip pocket so that stitching for hidden magnetic snap is not visible.   Baste roughly 1/8 '' to secure pocket.


Elm Street Quilts Purse Pack tutorial


Place right side of primary fabric on top of lining fabric / pocket unit and pin.


Elm Street Quilts Purse Pack tutorial

Sew ¼ '' around all sides, leaving a gap for turning at the top.  

Turn inside out and close gap with pins.  Top stitch around edge.


Elm Street Quilts Purse Pack tutorial

Enjoy!  I made this one out of an outgrown pairs of my daughter's jeans.


Elm Street Quilts Purse Pack tutorial


I'll be linking my Bag It tutorial with Sew Cute Tuesdays, , Freemotion by the River,   WIP Wednesday's,  Let's Bee SocialMidweek Makers.  Fabric Frenzy FridayFinish it Up Friday and Finished or Not Friday.

Have a wonderful day! Patty

Words Are - My Entry for Blogger's Quilt Festival

Yippee!

It's time for Blogger's Quilt Festival hosted by Amy @ Amy's Creative Side.  I enjoy this virtual quilt show and am excited to enter my Words Are quilt into the Original Design category.

My regular blog readers will recognize this quilt but hopefully won't mind seeing it again!


Elm Street Quilts Words Are

The quilt was made for my daughter who adores the Harry Potter series.   (You may recognize this as a quote from Dumbledore.)   She is studying to be a writer so it is just perfect.

The quilt finished at 70 x 100'' and is backed with a soft gray flannel print.  I quilted it with organic wavy lines on my domestic machine.  The letters are all paper pieced.  Once the words were all assembled I figured out the layout and really enjoyed designing and creating the geese border.  The idea of using geese (besides being my favorite block) is represent all the possibilities open to her as she moves forward to college.

She loves her quilt!  It now lives with her in her dorm.

Elm Street Quilts Words Are

I sent my son up into the lifeguard chair in order to get the photos of the finished quilt.  He did great as a quilt holder but didn't truly appreciate the number of shots I felt I needed to take.  Large quilt backed by flannel is heavy!

Elm Street Quilts Words Are

Before you dash off, please go take a look at my Elm Street Quilts Bag It event.  I'm starting 3 months of weekly tutorials on various bags to encourage handmade for the holidays.  Making a bag - any bag, doesn't have to be from my tutorials - earns you entries to win some absolutely fabulous prizes from sponsors.  Don't miss this event - help me spread the word - tell your friends!


Thanks for stopping by!


Have a wonderful day! Patty