Showing posts with label Bag It. Show all posts

Monday, August 10, 2020

Hipster Bag


No surprise that I love to make bags!  When I saw this pattern for a hipster wallet appear in the latest issue of Modern Monthly from the Modern Quilt Guild, I immediately lost about an hour of time rummaging through my stash to find the perfect fabric.  Pattern is design by Megan.

I liked the idea of a bit of hand work on the bag so I choose Artisan Cotton by Windham Fabrics for the outside and a print by Figo fabrics for the inside - both were samples from QuiltCon. 

Pattern called for snaps to close the bag.  I didn't have any of those but I did have some button magnets which worked well.  (The trick to using these is to pay careful attention to which side of which magnet has the strongest attachment to the other and mark which side faces the fabric so you aren't confused.)


I also had a ready made strap that I rescued from another bag that had gotten overused.

The bag has 3 pockets, one of which has a zipper.


It was a really fun make.  I will likely make another using cork now that I understand the construction process.

Have a wonderful day! Patty

Friday, June 14, 2019

(Gift) Bags

I've a niece and nephew (twins) set to graduate from high school and move onto college.  I decided to make them each a zip bag - something that they could take to college.  I typically make these in their college school colors (or some facsimile) but I hadn't nothing in my stash that would work so I made these!

My nephew loves the outdoors - fishing, hiking etc.  The fabric looks like tree bark!


My niece loves pastels - pinks especially.  I found this fabric in my stash and spiced it up a bit with a brighter zipper.


Finally, couldn't help myself and made one more - this one for my sister.  They are about to move a long distance and figured she might enjoy a bag for their trip.


I followed my tips for boxy bags.  There is 2 layers of fusible batting so the bags have some structure.


Have a wonderful day! Patty

Wednesday, September 12, 2018

Another Sew Together Bag

I am just in love with my finished Sew Together Bag - so much so that I think I may make another one - in the same fabrics - for me!!


This bag was gifted to a friend who gives me plenty of encouragement and advise about my quilting.  I hope she likes it!


This is the second of these bags that I've made.  My secret to success is two-fold.   First, take it slow - make the bag across several days, never trying to do too much at once.  Second, seek out some on-line tutorials - for example, I find these posts about Sew Together Bag constructions to be incredibly helpful.

My first STB is filled with all the supplies that I need when I travel with my machine.  I just love how much I can fit inside!


Have a wonderful day! Patty

Wednesday, August 15, 2018

Some Bags

If you've been reading my blog for any length of time, you'll know I love making bags.

I made two recently - one for me and one for a friend!


For these, I used Anna's Wide Open Zippered Pouch tutorial.


And they sure do live up to their name.  This is the middle sized, boxed at 1 1/2 ''.

I also made great progress on a Sew Together Bag.  I enjoy making this bag but only if I spread the construction over several days.  Here is what I have so far -


Hope to finish this one up soon. 

PS - Clearly I like this fabric as a bag lining.  I'm using up bits left over from a quilt back.

Have a wonderful day! Patty

Monday, March 19, 2018

My experiences at a quilt retreat

I got to spend the weekend at a guild retreat two weeks ago.   We were at the beach and had amazing weather.


Our room had a view - you can see the reflection of the palm trees in the windows and the weather was nice enough that most of the time we could open the windows..


We spent a lot of time working on this Amethyst Bag by Sew Sweetness.  Far too much time, actually, because there were lots of steps.  I ended up putting it aside so that I could finish it at home.  It is a really nice bag. 


I used Fragile by Zen Chic for the outside and inside of the bag.  I'm loving my two mesh pockets.  Many bags were finished during the retreat and each time one was 'birthed' (the final stage of turning it inside out) there were large cheers in the room.


We also had a Secret Sister swap.  I was totally spoiled with some chocolate, a small quilting frame and an awesome bag filled with goodies.


I arrived with a multitude of projects but besides the bag, really only worked on one.  But it was a fun one -  I got all 33 of my blocks made! I loved working with this fabric (Sunprint 2018) so much.


A couple of things that I will do for my next retreat -
  • Pack less.  I don't sew as fast as I imagine I would in a world without children and laundry and other household distractions.  I brought so many project along but only worked on one of them in addition to the bag.  
  • Prep ahead.  Cutting as much ahead of time was a really good idea.  There isn't much table space available.
  • Bring lunch/snacks. Enough said.
  • Save the difficult cutting for another time.  Being tired just does not led to accurate cutting!
Bottom line - I had way more fun than I expected to and I now know several of the guild members much better as a result of spending so much time with them.

Have a wonderful day! Patty

Monday, March 12, 2018

More Bags for Quilting Friends

I just love making project bags and put together two of them as a thank you to two quilting friends.


This ladies have been working hard to organize our guild retreat and I wanted to make them a little something to say thank you.

Before the retreat, we were each assigned our Secret Sister.  I made mine a little bag!  The fabric on the handle is the same as the lining fabric.


The tutorial for the project bags - which were featured in Bag It 2017 event - can be found here.  Fun to make - I use mine all the time!   The tutorial for the boxy bag is here.

More about the retreat coming in a post later this week!

Have a wonderful day! Patty

Monday, February 12, 2018

Mini Bags


Aren't these fun?  These were recently gifted.   They finish at 5'' x 4''  - see tutorial.

I'm just in love with this bag made from the latest Alison Glass line and will need to make another one of these for me.


I'll be linking up my bags with  Freemotion by the River,   WIP Wednesday's,  Let's Bee SocialMidweek Makers.  Needle and Thread Thursdays, Finish it Up Friday and Finished or Not Friday.

Have a wonderful day! Patty

Saturday, December 23, 2017

Congratulations to the Bag It Prize Winners

I had a blast with Bag It this year and hope you did too!  Over 600 - yes 600! - bags were shared on the link-up and in the Facebook group.

See those 600 + bags on the link-up on in the Elm Street Quilts QAL Facebook group!

Thanks to our amazing sponsors!  They supplied so many wonderful prizes and I really appreciate the support they brought to this event.


Winners were chosen randomly.  Entries were earned by sharing completed bags via Facebook group, the link-up or via email.   Winners have all been notified by email and have accepted their prizes.

Congratulations to -

Aurifil   
(Website  |  Facebook  |  Instagram)
Winners of the thread set:  Martina, Holly & Kat

Bagmaker Supply   
Winner of the $50 gift certificate: Brenda

By Annie   
(Website  |  Facebook  |  Instagram)
Winner of $25 gift certificate:  Diane & Irene

Fat Quarter Gypsy
Winner of patterns to make several pop-ups plus Wingman:  Danice

Fat Quarter Shop 
 (Website  |  Facebook  |  Instagram)
Winners of $25 gift certificate: Corne, Michelle, & Lisa

Green Fairy Quilts  
 F8 bundle  Moda Autumn Reflections: Daryl

OLFA
 (Website   | Facebook  |  |Instagram)
Winner of Splash Rotary Cutter, folding cutting mat and and the new 45MM Endurance™ Rotary Blade - Terry, Ann, Chris  

Sew Demented
 Winner of the Sew Together Bag plus a starter fabric pack:Kelly
Winner of a pattern of their choice: Dorothy 

Sew Sweetness 
 Winner of $40 gift certificate to her pattern storePaige

Zip It   
  Winners of $25 gift certificate: Alida, Sandra & Tracey

Congratulations everyone!


Have a wonderful day! Patty

Friday, December 15, 2017

Bag It Wrap-up

Time flies while you are having fun!   I've really enjoyed this year's Bag It event and hope you have as well.  The link-up closes tonight at 11:55 pm ET.


I'll be drawing the random winners over the weekend so watch your inbox for an email from elmstreetquilts.  The prizes are just amazing - take another look at what these wonderful companies have offered :


Each year (this being the 3rd one), I create a series of new bag tutorials hoping to inspire.  My favorite part of the event is when someone made a bag from one of my tutorials.


Creating bags from a designer pattern was a new add for this year's Bag It event.  I enjoyed sharing a bit about each of the featured designers and their companies.


Special thanks to Joanne Hillestad of The Fat Quarter Gypsy Designs for being the overall sponsor for our event.  I use my pop-ups every day.  These were loads of fun to create.

 (See the Fat Quarter Pop-up post.)  


I've been a fan of Annie Unrein of Patterns by Annie and ByAnnie.com for a long time and enjoyed sharing a bit about her and her company almost as much as I enjoy using my Get Out of Town Duffel bag. 

  (See the Get Out of Town Duffel bag post.)


When I made my Kismet Trinket Box, I intended to gift it to a friend.  But, I love it so much, I'm keeping it myself.  Thanks Sara Lawson of Sew Sweetness for supporting our event.

(See the Kismet Trinket Box post.)


I use my Sew Together Bag all the time and it was fun to feature Michelle Tucker, designer of the Sew Together Bag.  On my list for post holiday sewing is another of these bags - I'd like to make one in rainbow colors. 

(See the Sew Together Bag post.)


Thanks Annie, Michelle, Joanne & Sara!

Photo credit to designer pictured

Annie Unrein from ByAnnie  &  Michelle Tucker from SewDemented (top row)

Joanne Hillestad from Fat Quarter Gypsy &  Sara Lawson from Sew Sweetness (bottom row)


And thanks to all of you - I really appreciated your comments, your support and I enjoyed seeing photos of your bags.

Best of luck to everyone in the random draw!


Have a wonderful day! Patty

Monday, December 11, 2017

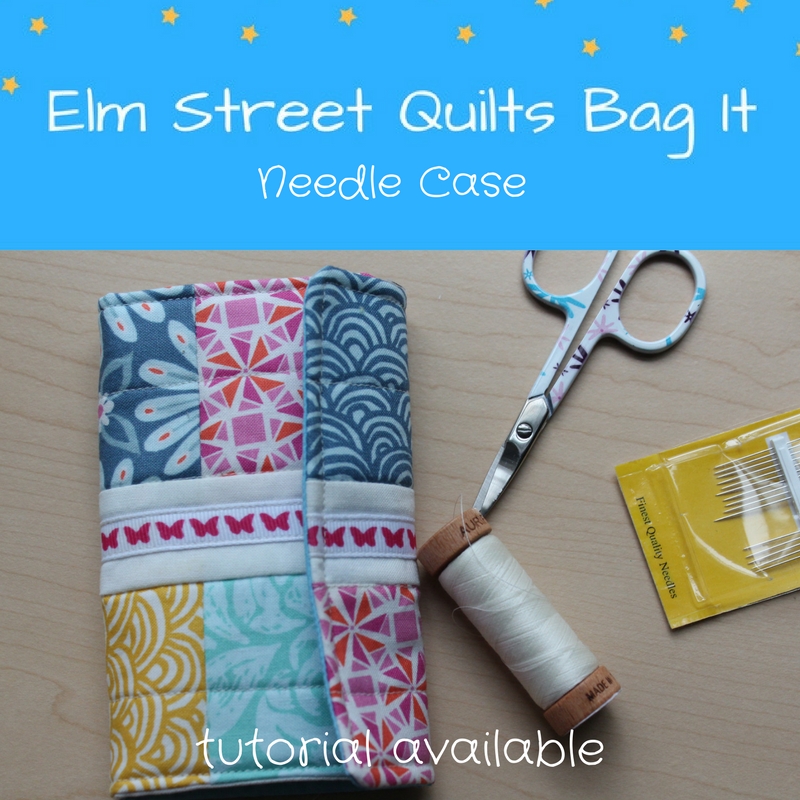
Bag It - Needle Case Tutorial


Need a quick gift for yourself or your BQF (best quilting buddy)?  What about a needle case?  I need for a couple of these to store with my various hand stitching projects.

My finished needle case is 5 x 3''.

Supplies


Note - a slightly wider piece of hook & loop tape will also work.

Fabric Prep

Adhere fusible fleece to wrong side of outer fabric.  Quilt and embellish as desired.

Right sides together, sew the two pieces of lining fabric together, leaving a gap in the seam of about 2'' for turning.  Lining will now measure 5 ½ x 8 ½ ''.  Press seam open.


Assembly

Sew one part of the hook and loop tape to the outer fabric, centering it top to bottom and lining the tape edge slightly more than 1/4'' from the outer fabric edge.

Sew the other part of the hook and loop tape to the lining fabric just slightly more than 1/4'' from edge. It should be sewn to the large lining piece - the blue fabric in my sample.  (See photo below for placement.)


Place the two units, right sides together, making sure that the hook and loop tapes are aligned on opposite ends, i.e. are NOT on touching

Sew 1/4'' seam all the way around.  (See photo A.)

Carefully turn unit right side out through gap left in lining.   (See photo B.)  Trim seams as needed to get crisp edge.  Press.

Top stitch around all four sides, slightly less than 1/4'' from edge.  (See photo C & D.)


Close hole in lining by hand.

Center felt over seam line in lining and pin. Sew from top edge stitching to bottom edge stitching.  This line of stitching serves several purposes.  First, it secures the felt to the needle case.  It also creates the fold line for your case.  As a bonus, the stitching also hides the hand stitching you just did to close the lining hole.  (Brilliant, right?)


Fold over needle case on the fold line the stitching created.  Align a ruler and mark along case edge for second folding line.  Stitch along this marked line.


Enjoy your new needle case!


Make one for every quilter on your list!


Linking up to Tips & Tutorials on Quilting Jetgirl

Have a wonderful day! Patty

Friday, December 8, 2017

Bags and more Bags


My goal for December is to make 15 of these quilted zip bags to give as holiday gifts.  I'm really enjoying making these in all different fabrics.   The are 5 1/2'' tall and 8'' across at the top.  5 bags down, 10 more to go!

The Bag It event is wrapping up soon.  The link-up closes on Friday, December 15.  I'll choose the winners on the 16th and, once winners have confirmed via email, announce the winners on a blog post the following week.

Note, if you won't have access to your email from the 16th through the 19th, drop me an email so I know how to notify you if you win.  

Well over 260 bags have been shared so far and I've really enjoyed seeing each of them!  I've shared some fun new tutorials - one more to go - and you can find all the links to these posts here.

I do want to take this opportunity to thank out sponsors - Fat Quarter Shop, ZipIt, OLFA , BagMaker Supply, Green Fairy Quilts, AurifilbyAnnie, Fat Quarter Gypsy, Sew Demented & Sew Sweetness (Read more about the prizes by clicking on the company name.)


When you are ready to share on Instagram or from your blog, link-up a photo to claim your Bag It Entry
  • Photos linked from Instagram must contain the tag #elmstreetquiltsBagIt
  • Photos linked from a blog post must contain a link back to Elm Street Quilts.
Want to share and enter from Facebook?  Join the Elm Street Quilts Facebook QAL group and then record your entry via the Bag It Facebook Entry Form  
  • (Why the form?  Winners are notified via email and the form collects your email address plus it makes things WAY easier for me to randomly select winners.)
You can share the photo of your bag multiple times but ONLY enter it once either in the link-up OR in the Bag It Facebook Entry Form.   

You will know when your entry is 'official' because I will come visit and leave a comment thanking you for entering.  (I batch up my bag visits so it may be several days until I stop by!)

New to the event and want to join?  Read more here and check out the participant guidelines for everything you need to know!
(If you don't have blog, IG or Facebook, drop me an email with photos and I'll get your bag entered!)


Thanks for linking up!


I'll be linking up my bags with  Freemotion by the River,   WIP Wednesday's,  Let's Bee SocialMidweek Makers.  Needle and Thread Thursdays, Finish it Up Friday and Finished or Not Friday.
Have a wonderful day! Patty

Monday, December 4, 2017

Bag It - Notebook Cover Tutorial


Aren't these just adorable?

You can make notebook covers for any size notebook you desire.  It is a fun project and a great opportunity for some novelty fabric.  The notebook covers are reusable - just replace the notebook as needed.

You can personalize these too - with embroidery, embellishments and labels.  My guess is you'll make more than one to give yourself a chance to play!  I use the notebook below for keeping my notes about my local modern quilt guild.


The tutorial is written for the notebook below and is very easily adaptable for any size notebook!


The directions for the notebook cover have both illustrations and photographs.  The photographs are shown below and marked as 1 through 9.


Open the notebook flat to measure the dimensions. (See photo 1)   Cut a piece of batting that is 1/2 '' larger than the height (to allow for a 1/4'' seam) and almost twice the width.  (See photo 2)

Cut your fabric twice the height of your batting and the width of the batting plus 2''.  (See photo 3)

For example, the blue notebook measures 5 x 3'' closed and 5 x 6'' open flat.  Batting dimensions were 5 1/2 '' x 11 1/2''.  Fabric dimensions were 11x14 ''.  (See photo sequence below.)

With the fabric right side facing down, layer the batting, centering it on all sides.

Fold over fabric from each side, carefully aligning fold with edge of batting. (See photo 4)


Fold down the top and bottom edge over the batting, taking care not to fold the batting. (See photo 5)

Pin (or clip) along all edges.  If desired, mark your quilting lines.  (See photo 6) Note, if using pins, position the pin heads so they are hanging off the edge so they can be seen and removed as you sew.) 

Quilt lightly.  Once quilted add a line of top stitching along each of the shorter edges, roughly 1/8'' from edge.  (See photo 7)

Optionally, add a label of other embellishment to the notebook cover at this time.

Place notebook on quilted piece and fold over edges, adjusting until they are even on both sides. (See photo 8)  Lightly clip, making sure you do not catch notebook.  Open and close to make sure you are satisfied with placement. (See photo 9)

Sew a line of top stitching along top and bottom, roughly 1/8'' from edge.


This is what the inside will look like when finished.  You can see my particular fabric had a selevedge edge but that isn't necessary.  My goal was to make it look neat inside for when the notebook was changed.


I just love using these little notebooks!


Enjoy your new notebook!


I'll be linking up my tutorial with  Freemotion by the River,   WIP Wednesday's,  Let's Bee SocialMidweek Makers.  Needle and Thread Thursdays, Finish it Up Friday and Finished or Not Friday.

Have a wonderful day! Patty