 Yippee!!!
(This post was originally published as part of the 2015 Bag It event.)
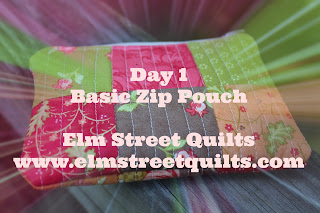
Today we are going to learn the basics of building a simple zip pouch. Throughout the month of November, we will build on the basics of this tutorial to create bags of different shapes and sizes.
Let's get started!! Our basic zip pouch will finish at 4 x 6 '' - the perfect size for a smart phone or to keep things organized in your purse.
For this bag, we are going to use a collection of mini charm squares - any 2½'' squares will do.

You'll need the following:
- twelve (12) squares each 2½''
- two (2) pieces of lining fabric at 4½ x 6½''
- four (4) pieces of fusible fleece each at 4½ x 6½''
- one (1) zipper at least 7'' long. (NOTE - this tutorial assumes you are cutting your zipper to size as per the tutorial. If you didn't want to do this, use a 6'' zipper.)
Assemble your squares in two different arrangements (for each side of the pouch) and sew them together.
Press each piece. They should measure 4½ x 6½''. Carefully place a piece of fusible fleece with the adhesive side against the wrong side of the fabric piece. Place a second piece on top, again with the adhesive side facing down. I find two pieces of fusible gives the bag great stability.
Iron to adhere the fusible to the fabric. And then trim as needed.
Quilt your fabric pieces. This bag was quilted at roughly 3/8''.
Prepare your zipper as per the instructions on this post on zipper tips and techniques. As you can see in the photo below, we used a larger zipper and finished off the edges neatly. You'll need a prepared zipper that measures 6'' (or slightly less) to allow for 1/4 '' on either side of the bag fabric.
Pin the zipper to the outer fabric, zipper pull side down. See how the zipper is open? Try and keep it that way!
Place lining on top, right side of lining down so it faces the right side of the outer fabric. Carefully sew the zipper, starting and stopping 1/4 '' from either side.
See that zipper nestled inside?
Here is what it looks like when you lay things flat.
Now repeat to attach other side. Lay bag out flat and use pins align lining with edge of bag.
Top stitch around zipper.
See how nice that looks?
Now before taking that next step, OPEN that zipper!! You'll need it open to make sure you are able to turn the bag inside out.
See the area at the top of the photo with the two sets of double pins? Don't sew between them - you'll be using that opening to turn your bag inside out!
The distance between the pins is roughly 2-3 ''. Starting at one of these double pins with a back stitch to secure, carefully sew all the way around. When you get to the transition area between the lining and the outer fabric, take it slow. You don't want to catch the fabric zipper stop.
Here is what it will look like when you are done.
Carefully reach into that hole and start to pull the bag through. Take it slow so nothing tears and just keep working it. It will fit. And if it doesn't, break out that seam ripper and take off a few stitches.
Look at how pretty everything looks!
You've two choices to sew up the hole in the lining. A couple of small whip stitches by hand will take care of it.
You could also pin it together and sew it on your machine, being careful to backstitch on each side.
Wasn't that fun and easy? Now it is your turn!
Coming later this week, we'll discuss how boxing corners can change the shape and size of your bag!

Fabric credits - Moda Fig Tree mini charm pack (outer) and Moda Sweetwater Noteworthy (lining)
This post was sponsored by Zipit, an Etsy store.
Have a wonderful day! Patty


Hi Patty
ReplyDeleteI am going to love following along with these posts. Hopefully I'll find time to join the fun.
Super quick, super easy (and the fabric makes it!) thanks
ReplyDeleteI'm from USA
ReplyDeleteThis is perfect! Just what I was looking for! Thank you!
ReplyDeleteSo cute pouch and fabric.Great tutorial,easy to follow!
ReplyDeleteThanks for the great tutorial! I have never made a bag of any kind before, but I am dying to learn! Gotta go get some fusible fleece and a zipper!! Oh boy!!
ReplyDeleteThank you for the tutorial! I'm looking forward to this Bag It series. Can never have too many cute bags....
ReplyDeleteYeah. I have a mini charm pack that will be perfect for this.
ReplyDeleteQuiltShopGal
www.quiltshopgal.com
Thank you for your tutorial.I am looking forward to all the bags.
ReplyDeleteThanks for a very good tutorial. I have some candy packs that I could use.
ReplyDeleteThanks for the inspiration, I finished the sweetest pouch this morning!
ReplyDeleteLooking forward to your next posts:)
Darn you! I made my second pouch this morning, and now, it's all I want to do! They are so cute
ReplyDeleteLate in responding but the instructions were the easiest I've read and DONE ... I'm a seamstress as well as a quilter and, for some reason, have trouble sewing zippers in bags but this worked beautifully. I thank you so much. Love the bag and plan on making it a bit smaller as well. Happy Holidays
ReplyDeleteI wish I could find zipper by the yd. It would make life easier.
ReplyDelete