Friday, June 29, 2018

Observations while Hand-piecing


I've posted before about my double wedding ring quilt - my very first hand pieced project.  To my surprise, I'm choosing to work on this project instead of sitting at my machine.  It is just that satisfying of a project.

Plus there is some learning!

First, it is painful to rip out hand stitches.  (Not physically painful of course.  Just emotionally.)  I need to actually add a seam ripper to my hand sewing kit.  My first attempt at sewing two blocks together resulted in mis-matched seams because I didn't even think about lining things up.

After ripping apart (ouch) my first attempt, I now have 4 blocks together. (Ignore the binding clip in the top center of the photo - it is marking the top of the block.)


Second, these little applique pins are perfect for pining seams.


Third, while I feel like I can judge a 1/4'' seam, I actually don't trust myself so I am marking seams.  I really love my chalk writer against the gray and use either a pencil or a Frixon pen against the other fabric.  (affiliate links)


I'm started to think about how I am going to quilt this - my goal is a wall hanging, 40'' square.  I really love the idea of making the entire thing by hand but am not at all confident in my ability to quilt by hand.  My only experience so far is my pillow (see that post) and I end up with some arm fatigue so can't do too much at once.


But I get ahead of myself - only 4 blocks together - more sewing to go!


I'll be linking up my finish with  Freemotion by the River,   WIP Wednesday's,  Let's Bee SocialMidweek Makers.  Needle and Thread Thursdays, and Finished or Not Friday.

Have a wonderful day! Patty

Thursday, June 28, 2018

A Podcast recommendation


Just a quick post today to recommend a new quilting podcast - The Quilt Fiction Podcast by Frances Dowell.

The Friendship Album is a story about 5 woman - Eula, Bess, Florence, Emmeline and Dorothy - who gather together as a group based on their mutual love for quilting.  In each episode, we hear a few more chapters of their story.


Frances is a novelist - and a close friend - and is narrating her novel in this weekly podcast.  She is actually still writing the novel, furiously typing to stay ahead of what she shares with us.  Each episode is about 30 minutes long and something fun to keep you company while you do some hand stitching or prep some fabric.

Frances has authored two other quilt fiction books and I'd recommend both of them.  Margaret Goes Modern is a collection of short stories which I've enjoyed reading several times. 


Birds in the Air is a novel about Emma Byrd and her adventures as a new quilter in Sweet Anne's Gap.  I love each of the characters in the book and look forward to the sequel.


(Note these are affiliate links.)

Read more about the podcast, including links to each episode, on Quilt Fiction.

Have a wonderful day! Patty

Monday, June 25, 2018

Strawberry Star - Clementine QAL Block 6


Block 6 in Fat Quarter Shop's Clementine QAL is called Strawberry Star and I'm excited to be one of the bloggers who gets to share their blocks today.  (Click to see more about my prior blocks.)

Star blocks could be my favorite block - they use flying geese, which I really love!  This is the larger block....


and the rest of the large ones...


I used the same gray cloud fabric for the smaller one -


and think I've got a good balance of color with the rest of the smaller ones.


Quilt top assembly instructions will be available next month (July 25) so I'm spending time in EQ7 to see if I might want to modify my layout or not.  Fun stuff!

Fat Quarter Shop's Clementine QAL benefits St. Jude's Children's Research Hospital.  Quilters are encouraged to donate $5 for each block pattern.  I really love how the FQS QALs support a different charity each year.  If you love the fabrics in the sample quilt, you can order the kit!

You can ready more about the QAL and get the latest block pattern today on the Jolly Jabber and read more about the Clementine QAL.  

I am happy to be sharing this QAL blog hop with all these other bloggers - go check them out!

*April of April Rosenthal (@amrosenthal)
Bonnie of Sunset Family Living (@sunsetfamilyliving)
Cara of That Crafty Cara (@thatcraftycara)
Carrie of Moda Cutting Table (@modafabrics)
Denise of Pieced Brain (@piecedbrain)
Elise of Elise and Emelie (@eliseandemelie)
Gina of Carpe Quiltin (@gina_tell_carpequiltin)
Heather of A Creative Pursuit (@acreativemama)
Hilary of By Hilary Jordan (@byhilaryjordan)
Jan of Cocoa Quilts (@cocoaquilts)
Jen of Heritage Threads (@heritage.threads)
Joanne of Quilts by Joanne (@turtlequilterjo)
Kairle of Kairle Oaks Handcrafted Goodness (@kairleoaks)
Kendra of Good Starter (@good_starter)
Kristen of 3 in the Nest (@threeinthenestraleigh)
Kristina of Center Street Quilts (@centerstreetquilts)
Leah of Ponderings from My Heart (@ponderingsfrommyheart)
Melanie of A Bit of Scrap Stuff (@mellierc)
Melissa of Happy Quilting (@happyquiltingmc)
Pat of Pat Sloan (@quilterpatsloan)
Pat B. of Life in the Scrapatch (@scrapatches)
Patty of Elm Street Quilts (@elmstreetquilts)
Rebecca of One Wee Bird (@oneweebird)
Sarah of 123 Quilt (@123quilt)
Seema of SSK Craft Shop (@sskcraftshop)
Sherri of A Quilting Life (@aquiltinglife)
Sondra of Out of the Blue Quilts (@sondradavison)
Stephanie of Quilt 'n Party (@quiltnparty)
Tanya of Tanya Quilts in CO (@tanyaquiltsinco)
Teresa of Aurea's Kitchen (@aureaskitchen)
Vickie of Crocheting Vixen (@crochetingvixen)


Have a wonderful day! Patty

Sunday, June 24, 2018

One Monthly Goal - June Finish Link-up


Ready to link up your June finishes?
Don't panic - this link-up is open until June 30 at 11:55 pm ET.


My goal for June was to make my hand-pieced double wedding ring blocks.  There are now six and I love them!


Now it is your turn! Please only link up if you finished your goal and if you also participated in the June Goal Setting Link-up.

There will be three winners this month - Fat Quarter Shop is offering a $25 gift certificate, Make Modern Magazine is offering a 6 month subscription to their digital magazine and Wendi Gratz of Shiny Happy World is offering a $25 gift certificate for her shopIn addition, anyone linking up at both the goal and finish link-ups earns a point towards the second quarter bonus prize which is a fat-eight bundle of fabric from Green Fairy Quilts.


Visit the One Monthly Goal event page for the specific requirements for links and social tags. 

And remember, to be eligible for the prize(s) by random drawing you must linkup at both the goal setting and the accomplishment linkup in a given month. (
June Goal Setting Link-up.)

Make sure you add a link to this OMG post so others can follow where you are linking.   Let's make that easy -  just paste this into your post:  


Sign up to receive email notifications when the One Monthly Goal linkup is open.  Think of it as a helpful reminder!  Joining the link-up from Instagram -see the tutorial.

Congratulations to Andree, Bonnie and Anne - our randomly chosen winners for July.
Congratulations to Vicki for our randomly chosen 2q winner.
Everyone has been notified by email and accepted their prizes.
Congratulations all!  (updated 7/2)


Thanks for linking up!

Have a wonderful day! Patty

Friday, June 22, 2018

400 plus HRTs

I'm having a blast and working through my Sweetwater charm square stash plus using up bits of some yardage for my HRT quilt.  Here is what 400 HRTs look like!


Ok, so that's 250 of them in stacks and the rest in bags! (smile!)

I am bagging them in groups of 50 which makes it easy to open my bin and count how many I have. Once I hit 500, I will start sorting them (roughly) by color to start assembling into blocks.


I'm a major fan of Sweetwater (Moda) and have many of their lines in charm packs or yardage but (regretfully) not even a charm square of some of the more recent lines.  This wasn't because I didn't like them but because I started collecting mini-charms instead.

Sunkissed, Road 15, Countdown to Christmas, Pure and Freedom

In hindsight, how fun it would have been to have every single Sweetwater print represented? Or at least a single print from each of the lines. If you have a charm square to spare of any of those newer lines (those are in bold italics), please drop me an email - I'd like to have a bit of every line in this quilt.
  • 2009/2010: Authentic
  • 2010: Pure, Make Life
  • 2011: Sunkissed, Countdown to Christmas, Hometown
  • 2012: Reunion, Mama Said Sew, Lucy's Crab Shack
  • 2013: Noteworthy, The Boo Crew, Road 15
  • 2014: Wishes, The Boat House, Elementary
  • 2015: Feed Company, First Crush, Mama Said Sew Dot, Holly's Tree Farm, Varsity
  • 2016: The Treehouse Club, The Cookie Exchange, Freedom, Volume II
  • 2017: Project Red, Sunday Supper, Hometown Christmas Edition, Authentic Etc
  • 2018: Harmony, Overnight Delivery, Oxford
Interested in making your own HRTs?  Check out my tutorial!


*** Please note - blogger has made changes to how I am notified of new blog comments which is making it difficult to reply via email - your comment shows up in my inbox as a no-reply blogger which means I can't respond!  Until another solution is available, I will reply directly to the comment on the blog .   UPDATE - There appears to be a clever work-around to this issue!  Fingers crossed it is working now.  Read about it here.***

Have a wonderful day! Patty

Wednesday, June 20, 2018

Some Random Hand Quilting

Last fall, I assembled roughly 100 solid color hexies and then started to randomly assemble them together.


This project is my first ever hexie project.

One assembled together, I added some fusible fleece to the back, and began to hand-quilt using just regular 50 wt quilting thread.


Each hexie will get some stitches and I am just loving the resulting texture.


Sometimes I use matching thread and sometimes contrasting.  Some designs fill the hexie, some do not.


My goal is to turn this into a pillow when I'm done!   Just a few more to go!

I am calling my piece random - both for the placement of the colors and the choice of the stitching pattern.


I am enjoying the hand-quilting but fusible fleece was the wrong batting to use for this project.  While it saved me the trouble of basting, the effort required to push the needle through is causing me some issues - pain in my arm etc.  As a result, I only do a little stitching each day.

Almost done - I'll be sure to share the final pillow!

*** Please note - blogger has made changes to how I am notified of new blog comments which is making it difficult to reply via email - your comment shows up in my inbox as a no-reply blogger which means I can't respond!  Until another solution is available, I will reply directly to the comment on the blog . ***

Have a wonderful day! Patty

Monday, June 18, 2018

Hand-piecing bliss

I'm in love with my blocks and the process of creating my blocks.  Six blocks done and I've started on the 7th.

Elm Street quilts Double Wedding Ring

The process of hand-piecing is just wonderful.  Every step is relaxing from marking the seam lines, to lining up the pieces to taking each stitch.

The inspiration for the block came from the fact that Tara Faughnan is coming to teach at my guild in June. I loved her double wedding ring class on Creativebug and am using her block pattern to create my templates.  (My blocks will be set differently than from the quilt from the class.)   The fabric is Sunprint 2018 from Alison Glass paired with a gray from Painter's Palette solids.

I am even in love with the back of the block!


*** Please note - blogger has made changes to how I am notified of new blog comments which is making it difficult to reply via email - your comment shows up in my inbox as a no-reply blogger which means I can't respond!  Until another solution is available, I will reply directly to the comment on the blog . ***

Have a wonderful day! Patty

Wednesday, June 13, 2018

Delightful Desert - A finish


I am just in love with this quilt!

These sweet animals decorated my design board for weeks.   While I love the cuddly bunny.....


..... the crane might just be my favorite.


For the quilting, I went with an all over FMQ design of loops, done on my domestic machine.  I briefly thought about custom quilting each animal but decided I wanted something that was playful.  The quilt is backed in the softest flannel and I'm hoping makes a baby happy. 

This was my very first commission quilt - I've always wanted to make a pattern by Elizabeth Hartman so was thrilled to tackle this one.


I'll be linking up my finish with  Freemotion by the River,   WIP Wednesday's,  Let's Bee SocialMidweek Makers.  Needle and Thread Thursdays, and Finished or Not Friday.

*** Please note - blogger has made changes to how I am notified of new blog comments which is making it difficult to reply via email.  Until another solution is available, I will reply directly to the comment on the blog . ***

Have a wonderful day! Patty

Monday, June 11, 2018

Conquering the HRT - half rectangle triangle


At a quick glance, constructing a half-rectangle triangle (HRT) might not seem much different than constructing a half-square triangle (HST).  The end objective is the same for the finished block - seam lines intersecting each corner.  But construction and trimming are a bit different.
HRTs can also face two different directions - the seam can run from the upper left to the bottom right (like the red HRT in the illustration) or the seam can run from the bottom left to the upper right (the yellow one).   As you cut your fabric, cut right side facing up whenever possible -  it avoids getting your brain all twisted up!

This HRT tutorial will focus on creating a HRT with a finished size of 2 x 4 '' , oriented like the red HRT in the illustration. 

There are 3 basics approaches to creating a HRT:

  1. Cut and trim the final block to the size you want. (My personal favorite)
  2. Cut precise pieces and no trimming required.
  3. Paper piecing (best choice for precision)

Let's get started!

Option 1: Cut and trim the final block.

To begin, cut two (2) rectangles each 3 x 5''.    Want a different sized HRT?  Start with the desired finished dimensions - add 1'' to the width and 1'' to the height to calculate cutting size. 

Place fabric RIGHT sides up, put a small mark 1/2 '' in the upper left corner and in the bottom right corner.  (Shown in photo A by the pen and the ruler.)  I cut my fabric in pairs, drew the marks on the top fabric and then stacked (right sides facing up) and cut.  Want your HRT to face the other way?  Place fabric RIGHT sides up, put a small mark 1/2 '' in the upper right corner  and in the bottom left corner. 

Align ruler against the dots and carefully cut. (photo C)  The cutting line is illustrated in photo B.


Place both parts of the HRT next to each other (photo D).  Flip one and place them right sides together (photo E).  The top fabric will overhang a small amount at the top and the bottom fabric be visible on the bottom.   Sew together with a 1/4'' seam.  Be careful not to stretch since these are bias seams.  (photo F)  Press.


At this point, your HRT will be roughly 2 1/2 '' wide and about 5'' tall.

If you are lucky enough to have a specialty ruler just for HRTs, you can start trimming your blocks to the correct size.  But if you don't keep reading!

Before we trim, let's go back and look at the angle of the seam line.   We want our seam line to intersect the corner in our finished block but this means it will NOT intersect the corner in our unfinished block - the block size we are going to trim to.  (Scroll back to that first illustration with the green HST and the red HRT side by side - can you see the difference in the angle?)

Let's look at this up close.  (The solid line is the finished size and the dotted line is unfinished.)

Since the seam line doesn't intersect the exact corner of the unfinished size, you need to be careful how you place your ruler.

Our unit currently measures 2 1/2 x 5'' and we want to trim it to be 2 1/2 x 4 1/2 ''.  Roughly this means a possible sliver trim on each side and 1/4'' from both the top and the bottom.

Position the ruler so a 1/4'' from top and left side of the ruler hits the seam line.  If all is perfect*, the seam line should also intersect the ruler at 2 1/4'' from the side and 4 1/4'' from the top.  (Tip - I put a piece of washi-tape near that point to help me find this point consistently.)  Trim and then flip around to trim so the HRT measures at 2 1/2 x 4 1/2"

* Things will never be perfect.  The block will likely not align perfectly. When this happens, I did my best to align things as evening as possible.  For my** quilt, things don't have to be perfect.  If I wanted perfect, I'd paper-piece these!

** It is your quilt.  You get to decide how perfect you want things to be.


You can also make two at once - similar to HST - but this involved making dots on both pieces of fabrics and lining those dots up with pins.  I tried it a few times and decided it was too much work.

This method yields two IDENTICAL HRTs.


To make two at a time, place your two pieces of fabric side by side.  One should be right side up and one should be wrong side up.  On the right side up fabric (the gingham print below), place your marks 1/2'' from the top and bottom corners.  For this tutorial, I placed my dots in the upper right and bottom left.   On the wrong side up fabric, place the dots in the opposite corners.  (photo A)

Place right side together, using pins to align the dots.  (Photo B) Sew 1/4'' on either side of the line. (photo C).  Cut apart between seam lines and you will have two identical HRT (above photo.)

I found this method to be too time consuming - lining up the dots to pin was too fiddly for me and was just an extra step.  It did not produce more accurate results.


Option 2: Cut precise pieces and no trimming required

There are a number of specialty rulers on the market that can help you create just about any block you want.  The HRT is no exception - the Tri Recs ruler can help you achieve that perfect HRTs every time!

To get started, you'll need a strip of fabric that maps to the unfinished dimension.  For this example, we need a 4 1/2'' fabric strip.

Fabric right sides up, align ruler along left edge and carefully cut along the diagonal.   Rotate the ruler 180 degrees and align along diagonal edge.  Cut along straight edge.  This ruler has a little corner cut out in the upper left.  It is important to cut that as well.

Once your pieces are cut, place both parts right sides together.  This cut corner allows you to align your pieces without any guess work.  Sew along the diagonal seam and press.   If any trimming is needed it will be very minor.


This is a great construction method if you don't mind spending time on prep work.  It is ideal for yardage and generates zero waste!

Option 3: Paper Piecing


The advantages to paper piecing HRTs - or any block - is accuracy.  It can generate more fabric waste than other methods but nothing beats paper piecing to get nice looking HRTs!


Want to give it a try?  Check out my paper piecing tutorial and download a paper piece HRT sheet.


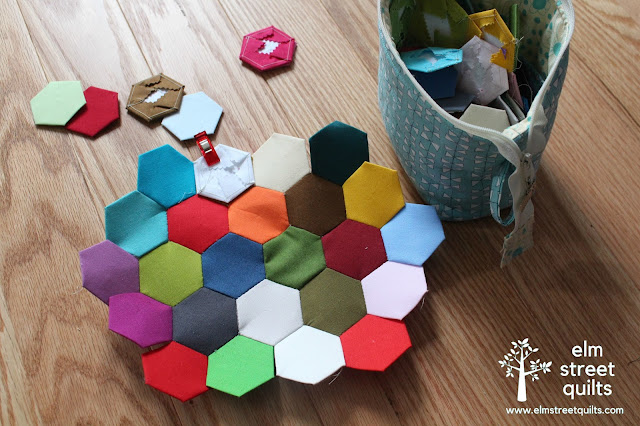
Hopefully one of these techniques will map to your interests.  Since I am primarily dealing with charm squares, I'm going with the first method.

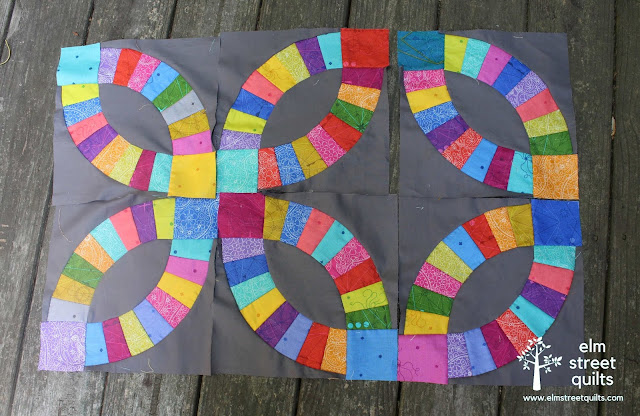
I'm making lots and lots of HRTs for my quilt and while many of them are turning out close to perfect, a bunch of them are not.  I've decided to embrace the wonkiness of this block.  If the seam isn't perfectly aligned, I am not redoing the block - I'm leaving it in.

Are you ready to tackle a HRT?

I'll be linking my tutorial at Tips and Tutorials at Quilting JetGirl and Meadow Mist Designs.

Have a wonderful day! Patty

Friday, June 8, 2018

My scrappy HRT quilt


And the pile grows!

I pulled all the Sweetwater based charm square packs piling up in my stash and am making lots and lots of HRT - half-rectangle triangle blocks.

Each block is trimmed to 2 1/2 x 4 1/2 ''.  (I'll post an overall tutorial for HRTs on Monday!)


I really want lots of variety in this quilt so will work to resist assembling blocks until the HRTs are all done.

How many will I need?  If I go with a small lap sized (48 x 64''), I'll need 384.  Slightly bigger (and more practical) 60 x 72 '' sized would need 540.  If I go big and make a queen size (90 x 108''), I'll need 1,215.  (Yikes!)

I've got 160 so far.   I think I'll keep going until I'm tired of making them or I run out of charm squares and Sweetwater scraps.  And then decide.

I couldn't resist making one block though - this block is 16 1/2 '' square unfinished.


*** Please note - blogger has made changes to how I am notified of new blog comments which is making it difficult to reply via email.  Until another solution is available, I will reply directly to the comment on the blog . ***

Have a wonderful day! Patty

Wednesday, June 6, 2018

Pick Up Sticks

I love quilting challenges.  A prompt, a deadline and then hoping the creative juices flow.

Pick Up Sticks is my latest mini in response to the Curated Quilts challenge for June.


The prompt was Connect and the colors included cream, yellow, mustard, navy, moss green and gray.

This was my third or forth attempt at a design.  I love the final result.  The 'sticks' are fusible applique.  I had fun with the straight line quilting on the sticks and micro stippling everywhere else.


Now all I need to decide is which side is up!  Right now, I'm loving this view as the top!


I'll be linking up at Curated Quilts here.  I've submitted an entry for each of their challenges - the competition is really amazing.  Fingers crossed.

*** Please note - blogger has made changes to how I am notified of new blog comments which is making it difficult to reply via email.  Until another solution is available, I will reply directly to the comment on the blog . ***

Have a wonderful day! Patty