Saturday, October 31, 2015

Bag It - Zippers


parts of a zipper

Let's talk zippers.

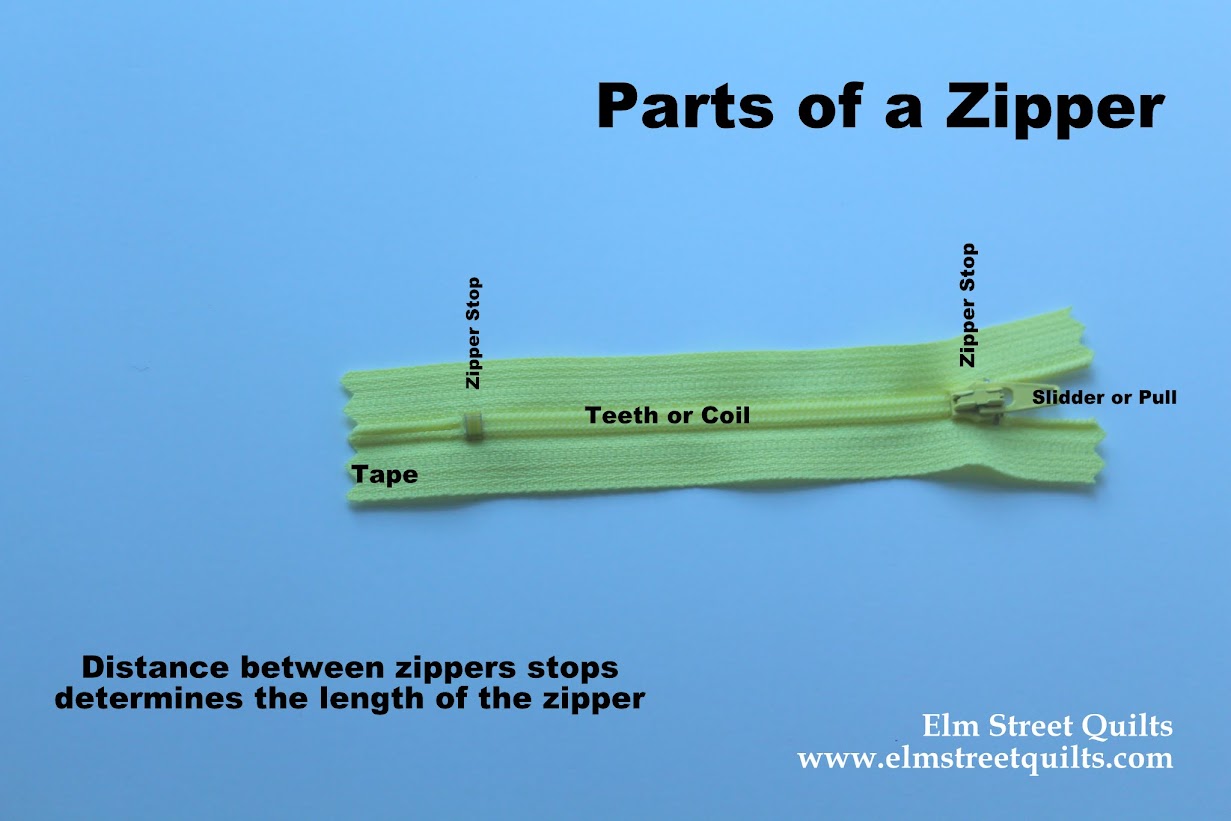
To open or close a zipper, you use the zipper slider (or pull) to open or close the zipper teeth (or coils) between the two zipper stops.  To attach a zipper into a bag (or clothing), you'll sew on the zipper tape.

Now you know the basics.

You order zippers by a length.  A 5'' zipper means there is 5'' between the zipper stops.

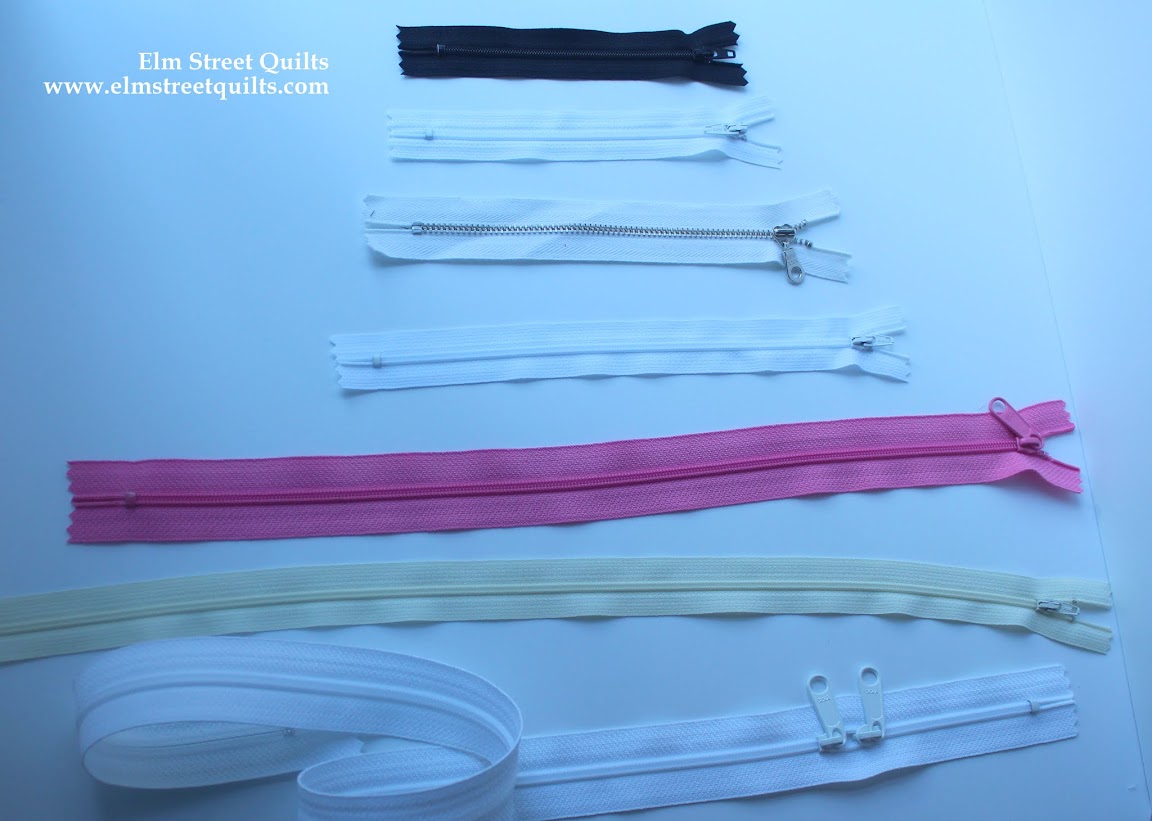
Zippers are available in what seems like an endless lengths and colors.   (From top to bottom, this is a 5'' (black), 6'' (white), 7'' (metal teeth), 9'' (white), 16'' (pink), 20'' (cream) and 30'' (double slider).  Except for the metal one, the rest of the teeth are all nylon coil.

zipper options

In my stash of zippers, I've got a selection of two different kinds of zipper sliders.  I like the larger one for larger bags.


For a really large bag - perhaps a duffle bag or a backpack - you can get zippers with a double slider.


Because I never know when the mood (or need) to make a bag will strike, I keep a stash of zippers on hand which are 6'', 9'' and 16''.    I then cut those down to fit any size I need.


Yes, I cut the nylon zipper down to size!  There are two advantages for doing this. Besides the obvious advantage that you can cut to size the zipper you need, you also get a nice finished edge when you create your own zipper stop.


To re-size your nylon coil zipper, measure out the size you need.  Put that zipper slider in the middle.
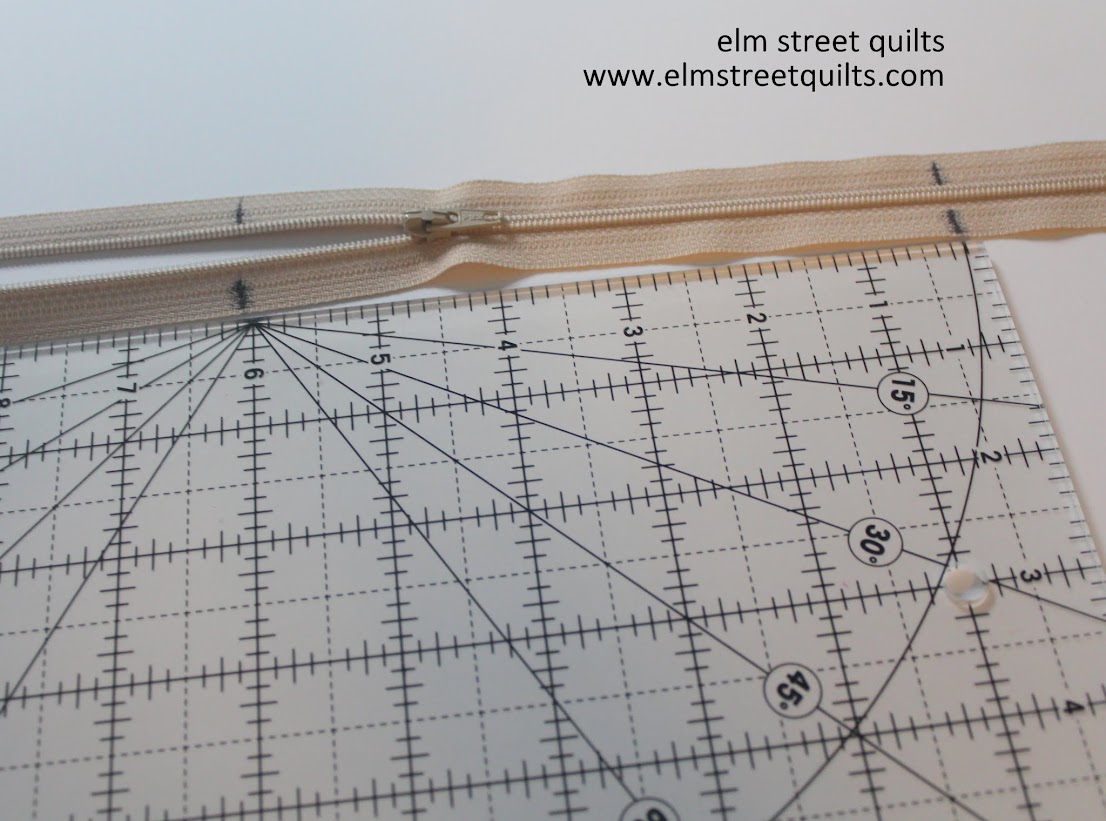
resizing zippers

Cut on those lines.

resizing zippers

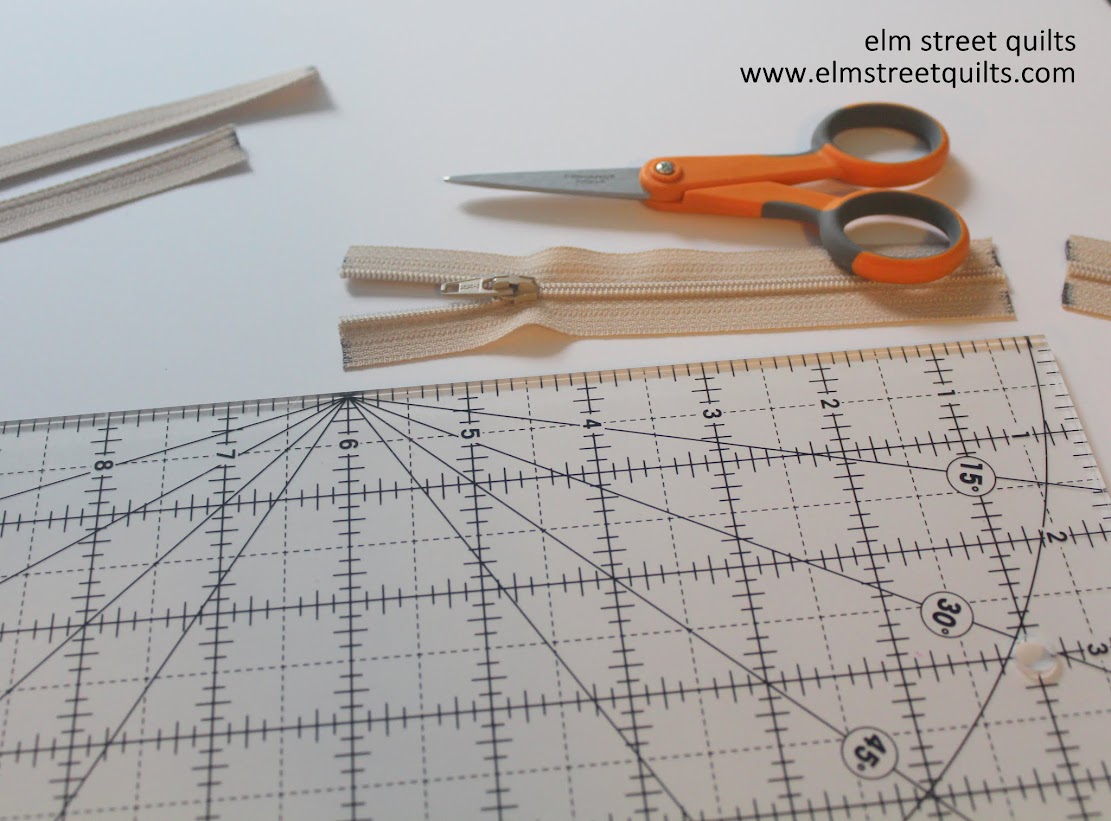
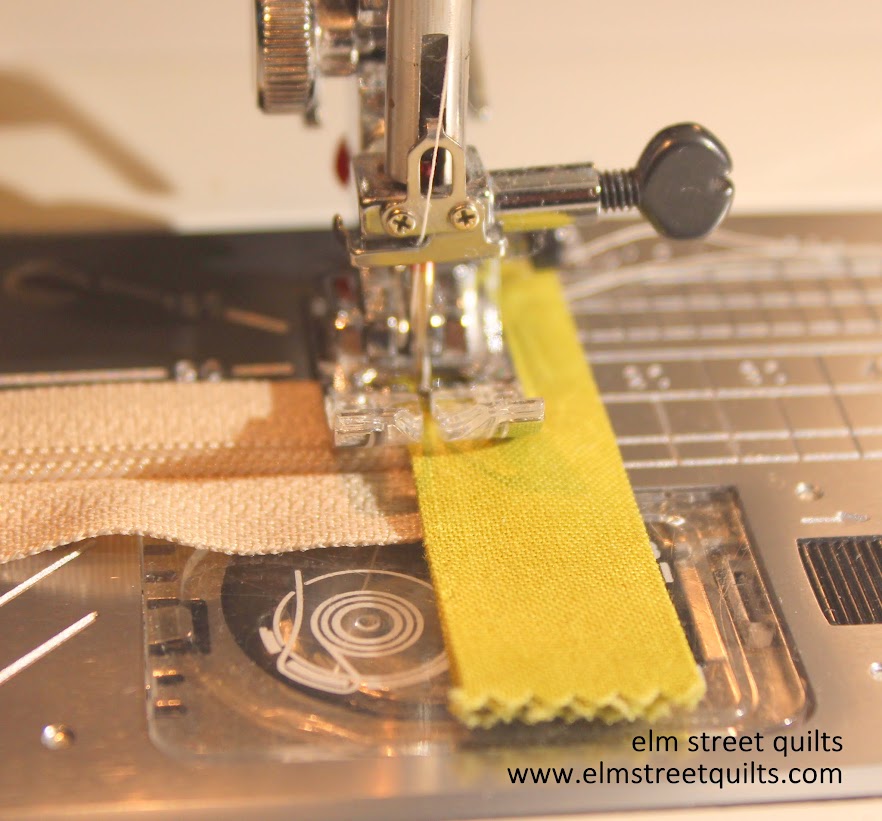
Take a piece of fabric roughly 2 1/2 '' and fold it in half and in half again.


Nestle the edge of the zipper inside and sew directly across.  Your machine should handle the nylon coils just fine.  Take it slow.

zipper tabs

Repeat on the other side and you've now got a zipper just the size you need.  (Trim to width of zipper.)


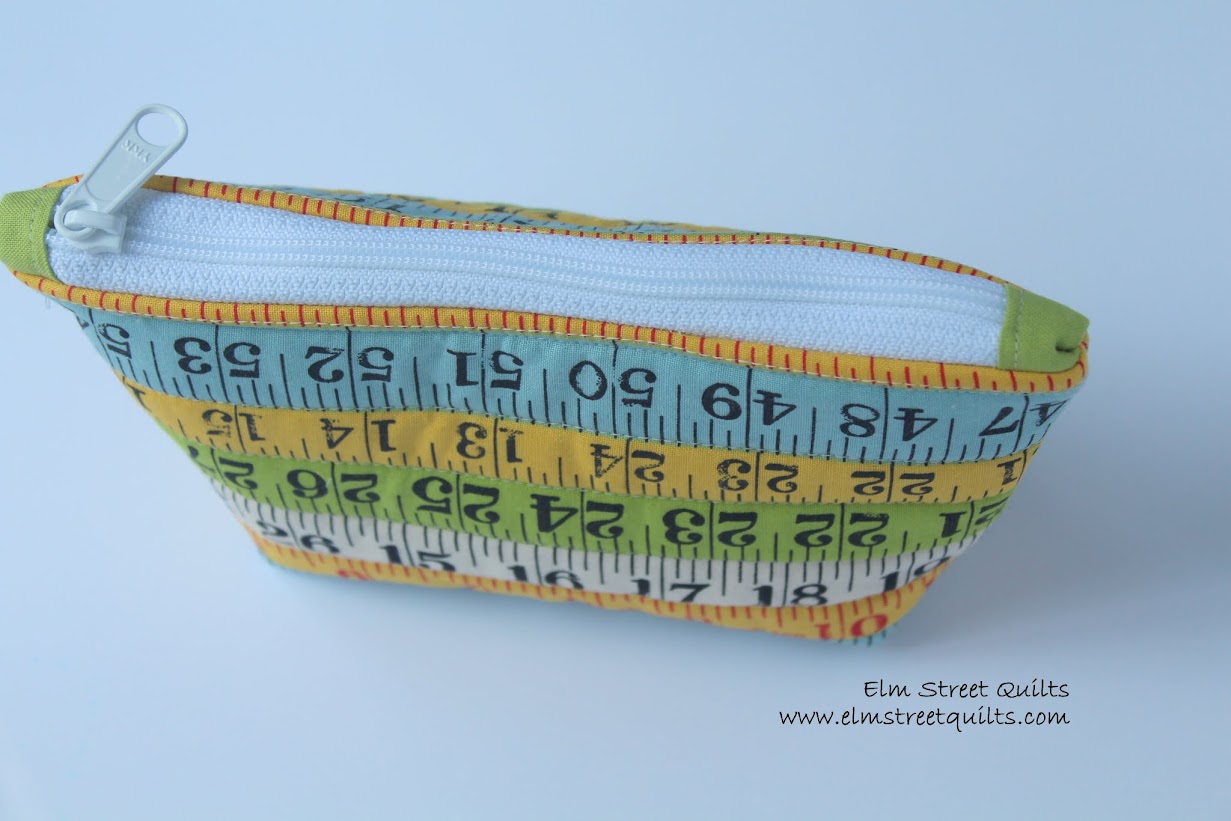
See how the zipper is now sewn into the bag?  (Bag tutorial coming next week!)

zipper installation

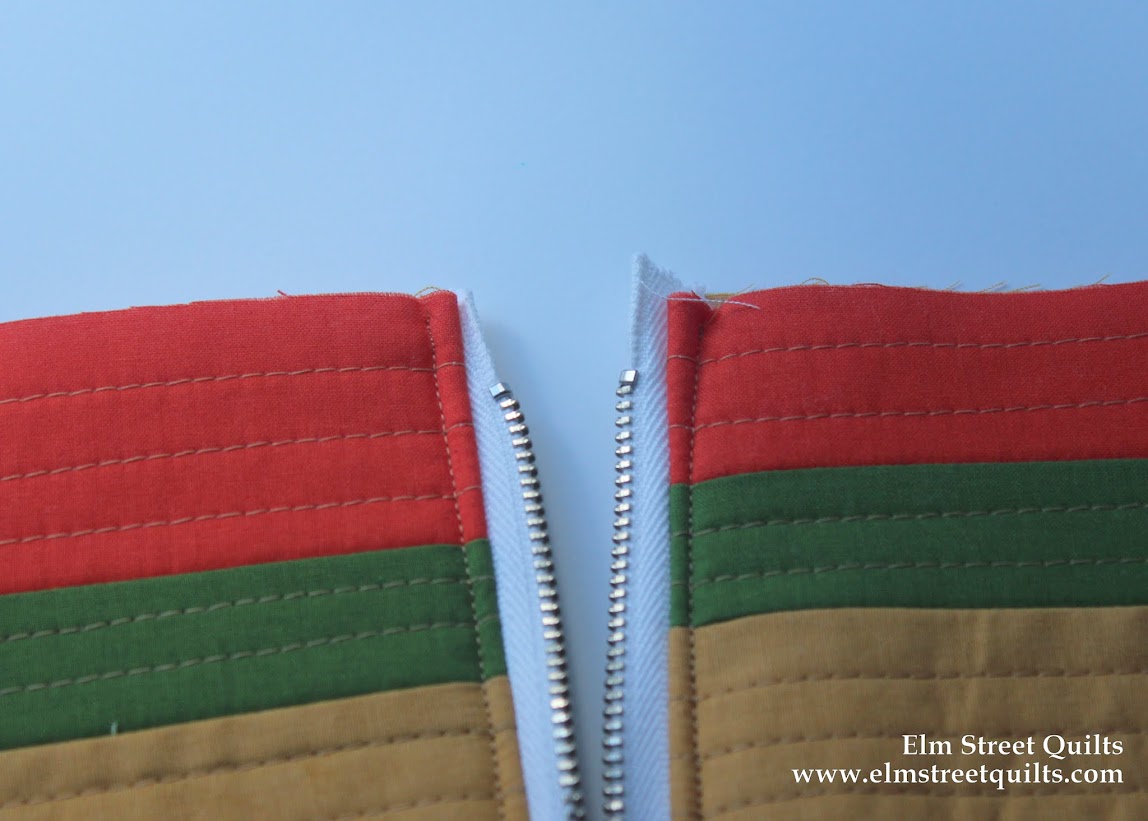
The zipper length you should cut to should be the width of your bag fabric minus 1/2 '' to allow for your seam allowance of 1/4 '' when you construct the bag.  You don't want to get the fabric zipper stop caught in your stitching.

I love the extra pop of color that these fabric zipper stops bring to a bag.

zipped bag

For the boxy bags we'll make, I'll do my zippers fabric stops a big differently.   Instead of folding a piece of fabric and nestling the zipper inside, I take two pieces of fabric and sandwich the zipper inside.

zipper tabs

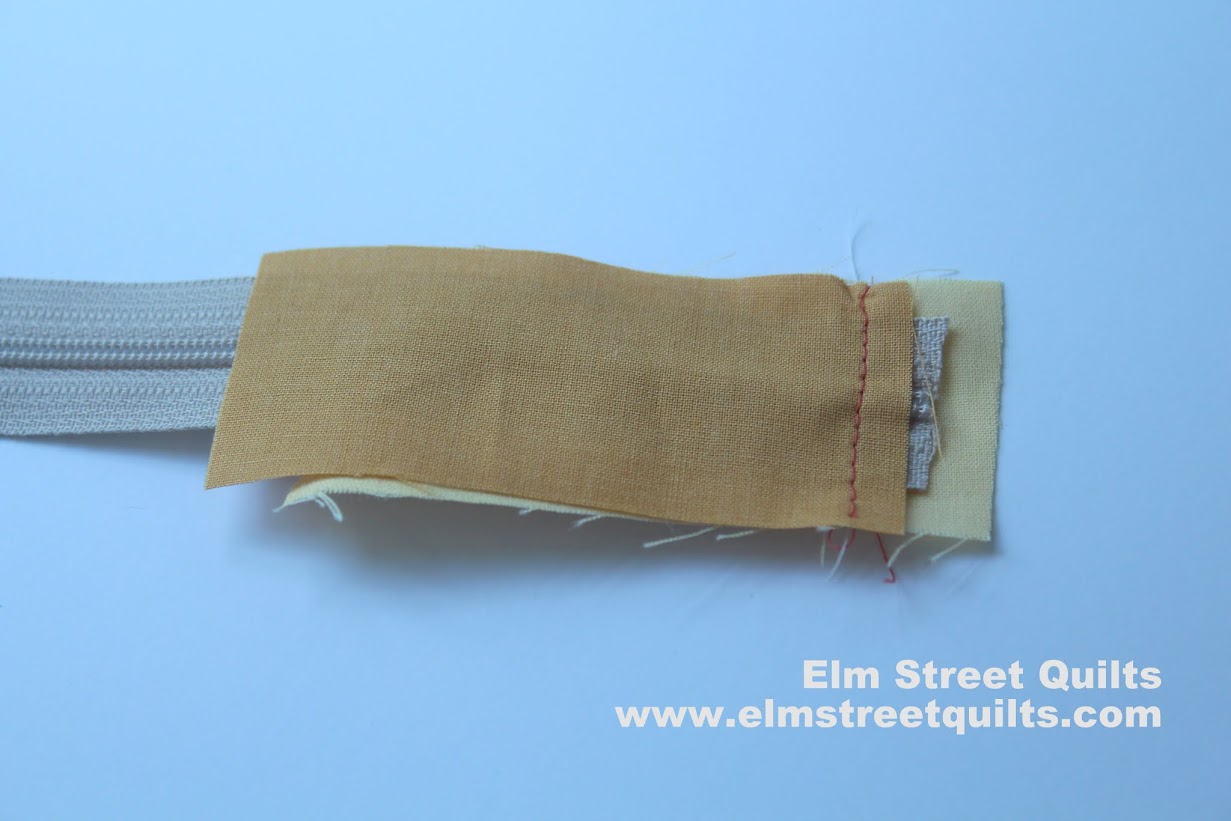
Sew across and then flip open and topstitch.


There are advantages to this method for boxy bags that you'll see in an upcoming tutorial.


Clearly, you can just buy your zippers the correct length that you need and skip the whole thing!!  I do that too!!

metal zippers

Find the look you want for your bag and make it happen!


With the basic of zippers as a reference, it on to bag making!

You can find more information on where I buy my zippers on this supply post and find more information on the Bag It series on this post.

Have a wonderful day! Patty

Friday, October 30, 2015

Harvest Parade

Everyone loves a parade!   

I started my Harvest Quilt Along in September and published a pattern each week for two of the blocks and so much enjoyed all the lovely comments and emails throughout.  

If you missed the QAL altogether and would like to purchase the pattern, you can do so in my Craftsy store.  If you just missed a week, drop me an email and I'll get you the missing week.

I created two versions of the wall hanging myself.  I assembled one into a wall hanging where it proudly hangs in my hallway.   I just loved pulling out all my fall fabrics.


Then I took pieces of the quilt and turned them into table runner and smaller quilts to place around the house.


For me, the most fun is watching what people do with a starting point - in this case the Harvest pattern - and do to make it their own.   It could be fabric choices very different from the palette I choose.  It could be a different final block layout.

I was thrilled to get some photos of finishes to share as a parade.  Sit back and enjoy!

KM created this lovely table runner with some of the blocks.  She tucked the extra blocks away for future use.  Check out her Both Side of the Pond for some more photos.


Janine took the blocks and assembled them into her own custom layout.   I love how those leave blocks are all clustered down the bottom of the quilt.  You can see more photos at her blog Crafty Tokyo Mama.


Theresa sent me a photo of her finished quilt top via email.  I love her color choices.   Theresa shared the photo via email and sent me such a nice note.


Rosa joined the QAL from Spain.  She made the quilt her own with some extra pinwheels added in and changed the placement on some blocks. You can see more photos of the quilt from her blog Rosa Patch - the Love of Sewing.


Kris loved the pumpkin blocks so much (I love those blocks too) that she made a lot of them and turned them into a table runner.  You can see more photos from her blog Kris Loves Fabric.


Francis shared her finished quilt top on the Elm Street Quilts Facebook page.  It looks like some of the leaves were made with actually leaf fabric!  How cool is that!


Jill emailed me a photo of her version.  The dark border really looks good and pulls the overall quilt together quite well.


This was my very first QAL and I so very much enjoyed it.  I had a blast creating the pattern and really working to write what I hoped were clear instructions.  There were over 600 downloads of the pattern from Craftsy and that made me feel so good!

I promised a little random giveaway for parade people.  I'll have my daughter draw a name later today. Thanks everyone for sending me your photo!!


I hope to work on another QAL for spring.  I will use the understanding on how everyone likes to put their own twist on the pattern into what I design.

Up next is the Bag It series.  A Bag-Along!  (Is BAL a thing?)   I hope you are joining.  You get points towards the giveaway by showing some sponsor love and even more points you make!   You can find more information on the main Bag It page including links to the giveaways and other helpful information.

Grab a button from my sidebar and help me spread the word!


Have a wonderful day! Patty

Wednesday, October 28, 2015

Bag It - Supply Information

There are a couple of basic ingredients and a little bit of special sauce required to make a bag.

You need:

  1. Fabric & Thread
  2. Stabilizer 
  3. Extras
The special sauce is - of course - you!

The Bag It series starts Monday, November 2.  For each of the Monday's in November, I'll introduce tips and tutorials on 5 different variations of bags and pouches. Many of the examples use zippers but they all don't.

There will be other posts during the week to discuss different options and twists on Monday's bags.

You can earn an entry (each worth 10 points) to win one of the gift certificates for each bag that you make during the period from November 2 through December 14.  You don't have to make the bag I've got the tutorial on - any bag or pouch you make and share counts as an entry.

How can you share?

Your blog, if you have one.

Via Facebook or via Instagram if you'd prefer.

Or you could send me a photo in an email.

You make five bags - just send or post a single photo of all the 5 bags and it will count as 5 entries.

My goal is to make entering easy!

One more thing, if you've haven't already earned some entry points by entering the Rafflecopter giveaway, go check out this post.  You can earn up to 9 points just by leaving a comment and visiting the prize sponsors!

Now, let's talk supplies.  Other ideas and sources, leave a comment to share with everyone!


Fabric & Thread


Need an excuse to buy some fabric?  Go for it!   But bags and pouches are actually a good excuse to shop your own stash.  They don't require much fabric and is a good way to use up scraps and fabric you've got lying around.

I've collected a whole bunch of prints over time just because I like them.  I've never used them in a quilt but they are just perfect for making a bag.


Precuts made great bags.

I save all those leftover mini charms, charms and layer cake pieces.  For example, I don't use a lot of low volume fabric in my quilting - I tend to just use a solid creme or white.  So I save all those low volume layer cake pieces because they make great linings for bags!

You can get precuts everywhere but I get all mine at Green Fairy Quilts - great prices and free shipping (in the US).

I've used solids in many of these bags - sometimes just for the lining.    I save all my scraps and will be using them to make a couple of the bags.
 My go to solids are American Made Brand (AMB) solids from Clothworks.  I love the fact that every step of the process to manufacture this fabric - including growing of the cotton - is done in the USA.  You can find AMB solids at Fat Quarter Shop and many other quilt shops.

The one advantage of using a stablizer on small bags is you don't have to actually quilt them.  However, quilting them is half the fun!

You'll see I do a lot of straight line quilting because I love the texture.  I've got a collection in colors of my go to thread (Superior Threads So Fine) because my machine just loves them.


Stabilizers


I use this fusible fleece  for all of my bags.  I've experimented over time and like the stability that two layers of this Pellon fusible fleece 987F brings to the bags.

I know there are other choices out there and I'd love to hear from folks via the comments what has worked for you.


Extras

While not all of the bags and pouches in the Elm Street Quilts Bag It series will need a zipper, most of them will.   I buy all my zippers from Zipit on Etsy.    I buy in bulk and generally get zippers larger than I think I might need and then cut them down.   I'll post more about that in a few days.


Some of our bags will feature a clear pocket.  I used this vinyl 8 gauge .  It isn't too thick to sew with yet doesn't tear easily.


Useful notions:

Clover clips are great for holding bags pieces together instead of pins.


Clover Hera Marker for marking quilt lines


Shop your stash or shop at your favorite store and get ready to Bag It!

(Note - the links to Amazon are affiliate links which means I earn a small % should you purchase.)


Have a wonderful day! Patty

Thursday, October 22, 2015

Bag It - Let's meet our fabulous sponsors


There are 3 terrific sponsors for the Elm Street Quilts Bag It series.   I am thrilled to introduce them to you!!

Fat Quarter Shop, one of my blog sponsors, offers a tremendous selection of fabric and very beautiful (and tempting!) block of the month offerings.  Fat Quarter Shop offers fabric from many different manufacturers and you can find anything you are looking for there!  Fat Quarter Shop is offering three $25 gift certificates for the Bag It Series.


My Janome machine and I just love Superior Threads So Fine.  (I even wrote an Ode to 402.)  Superior Threads offers a large variety of threads along with notions and needles and recently introduced pre-wound bobbins.   Superior Threads is offering two $25 gift certificates for the Bag It series.


Jennie has a terrific Etsy store Zipit which sells all kinds of zippers at wholesale prices.  I have been buying my zippers from Zipit for years and years.  Shipping is fast and the selection is amazing.   Zipit is offering a $25 gift certificate and is also sponsoring the series.


The Bag It series will feature all different kinds of pouches and bags perfect for holiday gift giving.

Guidelines:

  1. All prizes will be randomly awarded.
  2. Entries can be earned by helping to spread the word about Bag It and visiting the sponsors.  The Rafflecopter giveaway on this post gives you ten chances to enter, each worth 1 point.  
  3. Bags and pouches made during the period November 2 through December 14, 2015 will also earn entries.  Each bag made and photos shared will be worth 10 points.   More information on sharing photos and earning entries will posted shortly.
  4. Giveaway closes on December 14, 2015 at 8 pm est.  
  5. Winners will be notified by email and via a blog post on or about December 15. 
  6. Entries with an invalid or anonymous email address will be discarded.
  7. (Most important.)  Have fun!

Now let's show my sponsors some love and earn some points towards a giveaway!

Never used Rafflecopter before?  You can do as many or as few of those items listed as you want.  Just leaving a blog post comment - for example - earns you one entry.   Visiting one of the sponsors earns you another entry.   Just pick any from the list you want to do.  Any questions, please just drop me an email or comment below.  I'd be happy to help sort it out.

a Rafflecopter giveaway

The fun begins on November 2 but I'll be back next week with more information on supplies.

Have a wonderful day! Patty

Wednesday, October 14, 2015

Announcing the Bag It Series!!!!!

The holidays will be here very, very soon.  You can see those Christmas decorations in the store right next to the Halloween costumes and candy.

Want to make nice handmade gifts for people on your list?  How about a great bag or zipped pouch?

Mark your calendar for November 2 when I'll be launching an entire month filled with ideas for different bags you can make as holiday gifts!  I'm calling this series of posts Bag It!!  All the fun will be right here on my Elm Street Quilts blog!


There will be bags of all different shapes and sizes with plenty of tutorials. Never put in a zipper before?  There will be a tutorial for that!

And there will be fantastic giveaways from great sponsors.   I'm so excited about this and can't wait to share more!!!

More details next week on our fantastic sponsors and prizes along with all the ways you can earn entries.

Until then, can you help me spread the word?  Grab a button - large or small - for your blog.


Elm Street Quilts

or the small one
Elm Street Quilts


Have a wonderful day! Patty

Monday, October 12, 2015

Elm Street Quilts Harvest Parade photos wanted!!

Did you know that October 30th is National Candy Corn Day?


Neither did I!

It is also the day of the Elm Street Quilts Harvest QAL Parade!!


Hosting my Elm Street Quilts QAL has been so much fun and I just can't wait to see photos of your quilts.

Please email me a photo (or a link to a blog post) of your quilt top (quilted or not quilted.)  If you used some of the blocks and made your own version, send me those photos.

Like this pumpkin mini....


or this table runner....


Send your photos to elmstreetquilts at gmail.com by October 29th to be in the parade.

And there might just be a prize randomly given to a lucky parade participant!!

The instructions for all weeks are available from my Craftsy store.  They are free for until October 15th.   After then, there will be available for a fee.  You can find the patterns in my Craftsy store.

An important reminder -  the pattern you download is for your own personal use.  This means you can not duplicate it.  You do not have permission to give a copy or to email a copy anyone.   You can refer them to my blog and they can download their own copy.


Grab button for Elm Street Quilts Harvest QAL
<div class="Elm Street Quilts Harvest QAL" style="width: 150px; margin: 0 auto;"> <a href="http://www.elmstreetquilts.com" rel="nofollow"> <img src="https://blogger.googleusercontent.com/img/b/R29vZ2xl/AVvXsEjc-JYEUmq1B5AzFw_GILDaj5BnxWlRzkEIlYehBziSMj8TWIT2pvXULFXKVgE_R03lHVSsismSUufOYACZiE8oftXjgkFkZKffyHTS2T2cG9tpmEAfhyD7svxI2qJV7gBXZL0kKIIXrIY/s125-no/Harvest+QAL+ElmStreetQuilts.jpg" alt="Elm Street Quilts" width="150" height="150" /> </a> </div>


Until the parade, post your progress on your blog and please grab the button! 


Post your progress on Instagram and use  #elmstreetquilts.


Post your progress on Facebook on the Elm Street Quilts Facebook page! 


Have a wonderful day! Patty