Saturday, December 26, 2015

Word16 Kickoff!!


2016 is less then a week away.  (Hard to believe!)  A new year is an opportunity for a clean slate, a chance to focus yourself on a goal - a resolution of sorts that will guide you and keep you grounded and focused through the new year.

Elm Street Quilts Word16 officially begins on January 1, 2016.

Want to join in?   You'll need to choose, make and share!


  • Choose one word (or a small phrase) that will become your focal point for the year.
  • Make a mini quilt - as simple or as fancy as you want - so that you can place that mini quilt somewhere that you will see it every day.  (And to keep it simple - as long as there is a word on fabric it counts.  You don't have to stitch the word on - you can write it on.  Or, you could stitch the word and put it in the frame.  Make it your own, something you will be happy to display to keep you inspired!)
  • Share your mini and a few words on why you choose the word and join the linky party which starts January 1.  You can share on Instagram #elmstreetquilts, on Facebook or on your blog.  If you want to play along but don't have a blog, Instagram or Facebook, you can also send also email a photo.  

The linky party will open on January 1, 2016.  Prizes will be awarded randomly on January 31.   I hope that everyone will take the time and visit and encourage each other.

We've got two great sponsors for Word 16!


Green Fairy Quilts is our first very generous sponsor for this event and is offering a $30 gift certificate to a participant who will be randomly chosen.   Green Fairy Quilts is a wonderful online quilt store that offers precuts, patterns and notions at prices that just can't be beat.  They are my source for precuts!  I've been shopping with Clint and Judi for years.  Shipping is quick and selection is terrific.


Chalk Lots is our second very generous sponsor for this event and is offering a set of Chalk Lots to a participant who will be randomly chosen.  Chalk Lots is a terrific product - amazing placements that allow you to send a daily message to your family or keep the kids entertained until dinner is ready.  Check out the Chalk Lots facebook page to learn more.  I've been a blog follower of Leslie's for some time at her A Friend to Knit With blog and was thrilled when she agreed to be a sponsor.

Hope you are going to play along!

Throughout the month of January, I'll offer a tutorial on a mini, share some of these minis I made for friends and family.

My word?  Discover.

I'll explain why next year!


Please help me spread the word - grab the button!
Elm Street Quilts One Word 2016


Have a wonderful day! Patty

Monday, December 21, 2015

Winter begins!

Winter begins tonight (11:48 pm US EST).  No snow here (yet) in NC so I made my own.


Remember snowflakes made of paper - exact same idea.  Before I cut fabric, I practiced with paper first.  Hadn't made one of these for awhile and my skills were rusty!


Want to make your own fabric snowflake?

Prepare a white piece of fabric with iron on light fusbile adhesive.  I started with a 8" square.


Fold in half.


And in half again.


Fold into thirds.  (This takes a little bit of fiddling to get things to line up.  I used a Clover Wonder Clip to keep things secure.)


Cut off extra.


Create your snowflake.  I used my favorite paper one as a rough template.


Unfold the magic.


Behold - snow!  Since I was cutting through so many layers, it was hard to get a smooth cut while everything was folded together. Once the rough cuts were there, it was very easy to partially unfold and trim things more neatly.

Iron onto backing fabric.  All those folds you created disappear easily under the heat of the iron.


Quilt. I made mine into a hot pad by using a layer of Insul-Bright batting along with a layer of batting.  (The shinny metal layer is faces up when you make that quilts sandwich.)


Fun and fast to make.  We typically get a little bit of snow here in central NC at some point during the winter.  Until then, my snowflake hot pad will have to do!


New visitor?  Please check out One Monthly Goal - share a quilting related goal each month for a chance to win great prizes from awesome sponsors.


I will be linking this tutorial up at Quilt Shop Gals' Night Before Christmas party.


Have a wonderful day! Patty

Tuesday, December 15, 2015

Congratulations to the Bag It Prize winners


260 bags were made and shared during the Elm Street Quilts Bag It series!!

I am just thrilled with the participation and all the nice emails and comments made me quite happy.

Big thanks for the three terrific sponsors for this series - Fat Quarter ShopSuperior Threads, and Zipit.

Mr Random helped me choose the winners this morning.  All the entries from the Rafflecopter and the entries from each bag made and shared were put into one big spreadsheet.  (I'm a spreadsheet junkie!)   I had my DH (dear husband) select the order of the prizes to be awarded and then use Mr Random to pick the 6 winners.

Congratulations to Lisa, Holly & Cindy for each winning a $25 gift certificate to Fat Quarter Shop


Congratulations to Kathy & Heidi for each winning a $25 gift certificate to Superior Threads.


Congratulations to Martina for winning a $25 gift certificate to Zipit. 


Emails have been sent to each of the winners.

Thank you to everyone who participated.  This was so much fun - perhaps we'll do it again next year!!

Coming in January is Elm Street Quilts One Word - sponsor and prizes announcement coming soon.  I hope you'll join in the fun!


Have a wonderful day! Patty

Sunday, December 13, 2015

One more day of Bag It!

Busy sewing away in your sewing space?   You've got -

left to enter a bag you've made and shared into Elm Street Quilts Bag It!!

(note - not sure how this countdown widget will display in blog readers)

There are just terrific sponsors for this series and I am so thankful to have their support!  Visit the sponsor post.  (You can earn up to 9 entries.)

Jennie has a terrific Etsy store Zipit which sells all kinds of zippers at wholesale prices.  I have been buying my zippers from Zipit for years and years.  Shipping is fast and the selection is amazing.   Zipit is offering a $25 gift certificate and is also sponsoring the series.


Fat Quarter Shop, one of my blog sponsors, offers a tremendous selection of fabric and very beautiful (and tempting!) block of the month offerings.  Fat Quarter Shop offers fabric from many different manufacturers and you can find anything you are looking for there!  Fat Quarter Shop is offering three $25 gift certificates for the Bag It Series.


My Janome machine and I just love Superior Threads So Fine.  (I even wrote an Ode to 402.)  Superior Threads offers a large variety of threads along with notions and needles and recently introduced pre-wound bobbins.   Superior Threads is offering two $25 gift certificates for the Bag It series.


As of this posting, there have been 201 bags made and shared as part of Elm Street Quilts Bag It - each bag shared earned someone 10 entries into the giveaway!  I've tried to make entering easy - you can share a photo of your bag (or bags!) on your blog, on Instagram (#elmstreetquilts), on the Elm Street Quilts Facebook page or send to me via email (elmstreetquilts at gmail dot com) and then go here to officially enter.  Enter as often as you want as you make new bags.  Any bag you make and share counts!   


See the Elm Street Quilts Bag It information page for more information.

I'm carrying forward the linky so keep adding to it.  It is great to share those bags with everyone.  (Don't forget however, to officially enter the giveaway.)


Have a wonderful day! Patty

Wednesday, December 9, 2015

Holiday Bag Giving

So what did I actually do with all those bags I made?
Follow my blog with Bloglovin

All wrapped up for gifting!   The Santa sack will be used to collect holiday cards on my hall table but - for now - is doing a great job displaying my gifts!


I always talk about these pouches as being for headphones - they are good for holding anything, including gift cards!


I put together some supply kits for these with vinyl perfect for crafting.  Check out my Etsy store where I've a limited set of supply kits available.   And I'm running a bit of a special in the Etsy store - buy two kits and I'll throw in a third kit for free!  (No coupon code required - ends Dec 15th.)   This means you'll get the supplies you need to make 6 headphone pouches for the price of 4.

And you've got just a few days left to enter the Bag It giveaway which closes at 8pm EST on Monday, December 14th.   So you've got just a few more days to make and share a bag - follow the instructions below to enter the giveaway. ANY bag you make and share counts - it doesn't have to be one that I've written a tutorial on.

Found another good tutorial elsewhere for bags?  Leave the link in the comments so everyone can check it out!!

Ready to enter?
  1. Visit the sponsor post.  (You can earn up to 9 entries.)
  2. For each bag you create and share between now and 8pm on December 14, you earn 10 entries into the giveaway!   Entering is easy!   Just share a photo of your bag (or bags) on your blog, on Instagram (#elmstreetquilts), on the Elm Street Quilts Facebook page or send to me via email (elmstreetquilts at gmail dot com) and then go here to officially enter.  Enter as often as you want as you make new bags.  Any bag you make and share counts!   

See the Elm Street Quilts Bag It information page for more information.


I'm carrying forward the linky from last week so keep adding to it.  It is great to share those bags with everyone.  (Don't forget however, to officially enter the giveaway.)


Have a wonderful day! Patty

Tuesday, December 8, 2015

Your Word - 2016


A new year beckons.

A chance to set a goal for the year - a resolution of sorts that will guide you and keep you grounded and focused through the new year.

One word is all you need.

Capture that single word on a mini quilt so that you can be reminded every day of your word.  The word that defines the year 2016 for you.

In January, there will be a linky party and the opportunity to share your word.   Prizes and sponsor announcement to come on December 26th and the party begins on January 1, 2016.

Hope you'll join in!!

Grab the button!

Elm Street Quilts One Word 2016


Have a wonderful day! Patty

Saturday, December 5, 2015

Quilting Tip - Staying Organized

Like this 'artistic' photo of a clothespin?


I have this memory from growing up of our laundry hanging on the clothesline in the backyard, using all that sunshine to get dry and smell wonderful.  There is another great use for clothespins .... quilting!

I use them to hold a stack of finished blocks together - each group of ten is pinned so I can easily keep track of how many I've made.

quilting organization tip

Another use - when cutting out multiple pieces of fabric, I use them to mark the piece name - I've got a bunch of these marked A, B, C etc or 1, 2, 3.


And, the best part?  They aren't expensive!

And for those of you visiting for the first time, welcome!   Be sure you check out my Elm Street Quilt Bag It series!  The giveaway ends December 14th so you've some time to enter.

zip or zipped bags

Throughout the month of November, I posted a series of tutorials on making five different styles of bags and pouches.  Here is the full list of blog posts:


I hope you found this tip on staying organized helpful.  I'll be linking up here.


Have a wonderful day! Patty

Friday, December 4, 2015

Week 5 - Elm Street Quilts Bag It!!

Do you know what you can make with one mini charm pack?

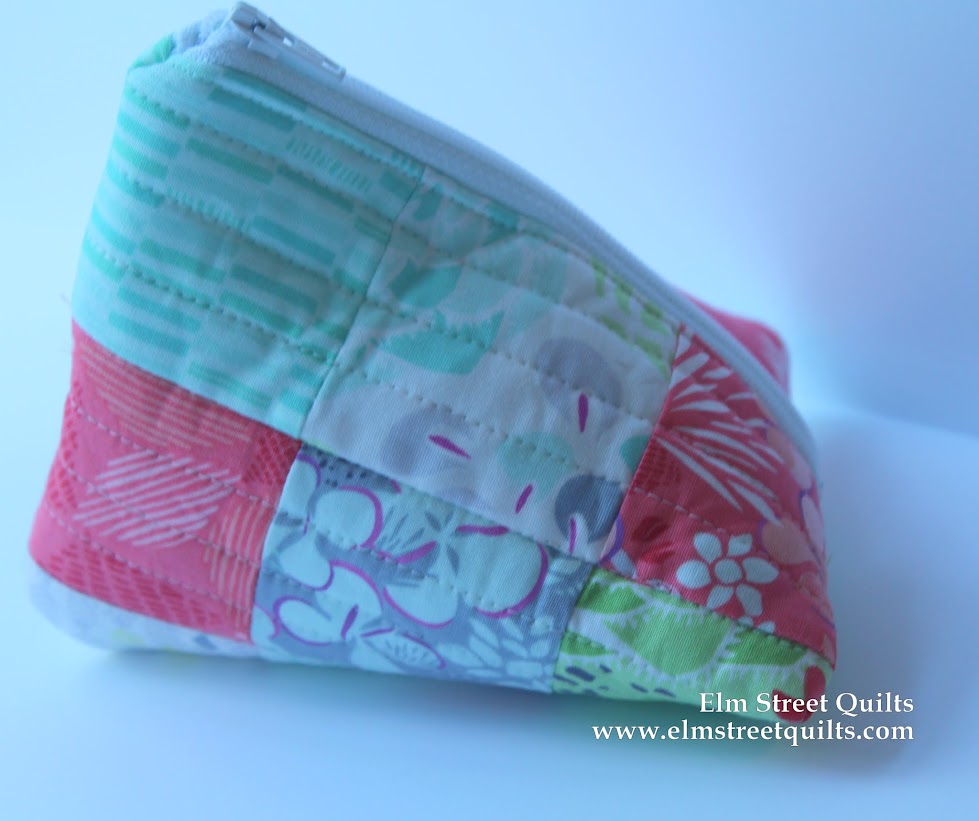
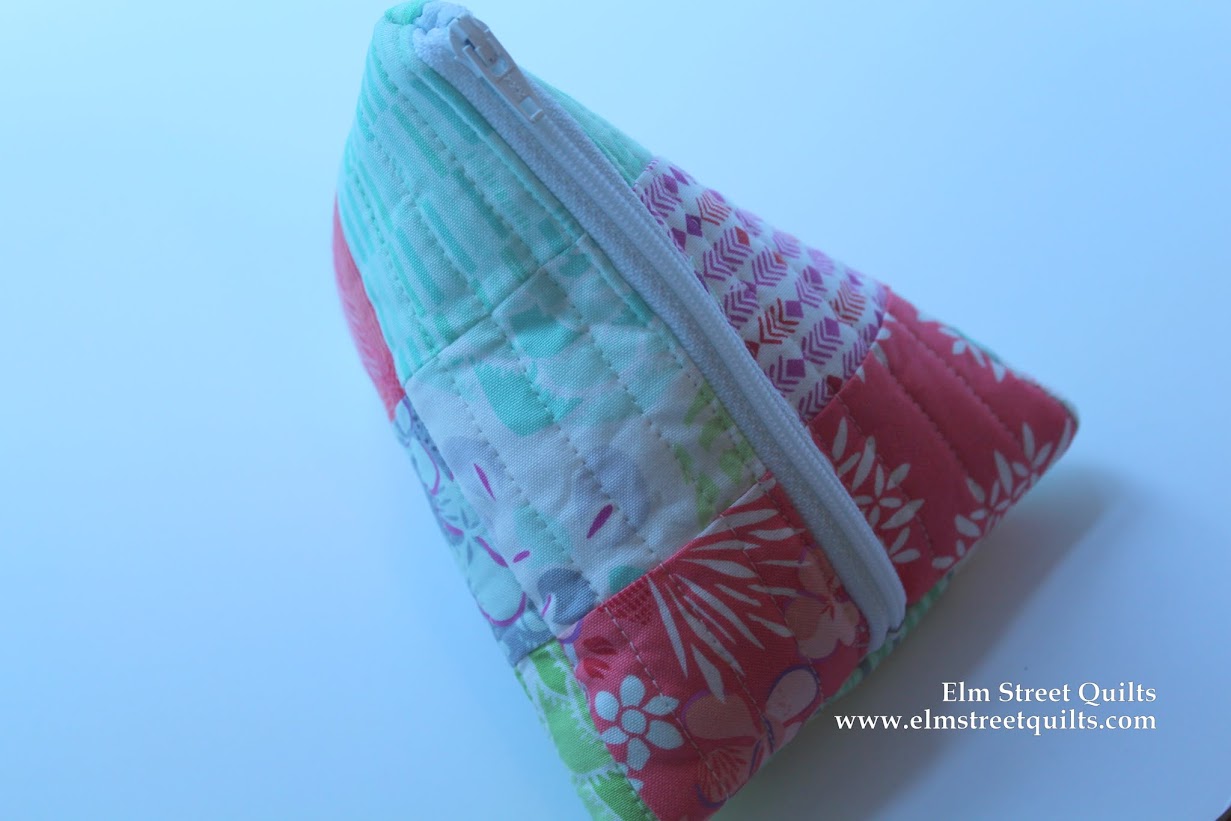
Three bags!!   I made two triangle and one basic zip pouch from one mini charm pack of the a Kate Spain line.  I just love each and everyone.  (Shhh, hope my sisters will too!)

zip bags made from charm packs

There have been a dozen days of Elm Street Quilts Bag It series, filled with tutorials and tips for making all kids of bags, most but not all with zips.

Miss a day?  Here is the full list of blog posts:


I'm about done with my holiday bag gift creating except for a few more headphone pouches on the cutting table.   Want a supply kit to make two of these?  You get two pieces of vinyl, two zippers and the fusible fleece you will need.  Just add fabric!  Check out my Etsy store where I've a limited set of supply kits available. 

And I'm running a bit of a special in the Etsy store - buy two kits and I'll throw in a third kit for free!  (No coupon code required - ends Dec 15th.)   This means you'll get the supplies you need to make 6 headphone pouches for the price of 4.


headphone bag tutorial

The Bag It giveaway closes at 8pm EST on Monday, December 14th.   So you've got just a few more days to make and share a bag - follow the instructions below to enter the giveaway. ANY bag you make and share counts - it doesn't have to be one that I've written a tutorial on.

Found another good tutorial elsewhere for bags?  Leave the link in the comments so everyone can check it out!!

Ready to enter?
  1. Visit the sponsor post.  (You can earn up to 9 entries.)
  2. For each bag you create and share between now and 8pm on December 14, you earn 10 entries into the giveaway!   Entering is easy!   Just share a photo of your bag (or bags) on your blog, on Instagram (#elmstreetquilts), on the Elm Street Quilts Facebook page or send to me via email (elmstreetquilts at gmail dot com) and then go here to officially enter.  Enter as often as you want as you make new bags.  Any bag you make and share counts!   

See the Elm Street Quilts Bag It information page for more information.

I'm carrying forward the linky from last week so keep adding to it.  It is great to share those bags with everyone.  (Don't forget however, to officially enter the giveaway.)


Wednesday, December 2, 2015

Triangle Bags - Size Options

triangle zip bag tutorial
Would you believe that there have been over 140 bags created and submitted as part of Elm Street Quilts Bag It?   I've been absolutely thrilled with all the beautiful bags that have been shared!

The linky party is here and we'll post it again on Friday.

There is still plenty of time to earn more entries = you've got until December 14 to make and share your bags.  (For overall information on the series, visit the main Bag It page.)

I experimented with some different sizes for triangle bags and wanted to share that with you.

The triangle bag tutorial was based on using a 6" zipper.  However, like all the other bags in this Bag It series, the size of the bag is really your personal choice.

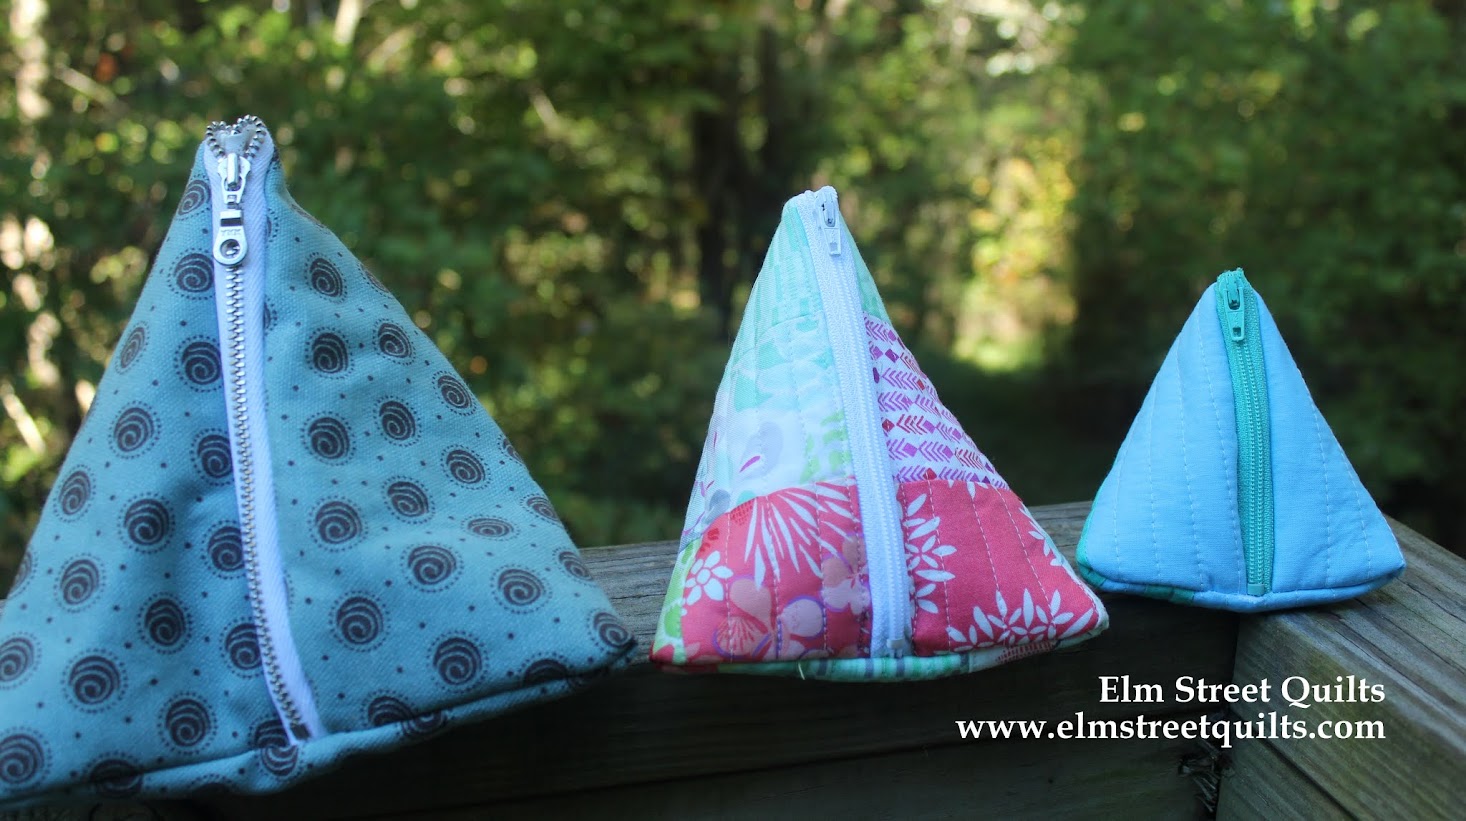
For these triangle bags,  I'm made them in three sizes.  They stand at (roughly) 6'', 5'' and 4''.   I find the mama bear size to be the most useful but the papa bear size is great for throwing toiletries into your suitcase.

triangle zip bag tutorial

To make the papa bear bag, I used a 7'' metal zipper and outer and lining fabric cut at 7 1/2 x 4 1/2''.

Mama bear size used the tutorial dimensions.

To make the baby bear bag, I used a 4'' plastic zipper and out and lining fabric cut at 4 1/2 x 3 1/2''.

The smaller dimension determines the zipper - or the zipper determines the smaller dimension!

Experiment yourself and share what size you liked.

triangle zip bag tutorial

So, what's been your favorite bag?   We did the basic zip, the boxy bag, mini storage bags, headphone pouches and now the triangle bags.  (shown left to right in photo below.)


Keep making and sharing those bags!  I can't wait to see what you make.


This post was sponsored by Zipit, an Etsy store.


Have a wonderful day! Patty


Have a wonderful day! Patty

Monday, November 30, 2015

Bag It - Triangle Bags


It is day 11 of my Elm Street Quilts Bag It 2015 series!


For overall information on the series, visit the main Bag It page.

We've done rectangles and boxes - today we are going to make a triangle!

This bag looks harder than it actually is.  And it is so cute - I've made a whole bunch of these to give away as holiday gifts!

Ready to get started?  

triangle zip bag tutorial


You'll need the following:

triangle zip bag tutorial
  • Fifteen (15) mini charms at 2½''
  • Lining fabric at  6½ x 10½''
  • Two (2) pieces of fusible fleece each at 6½ x 10½''
  • Six (6) inch zipper


Sew the 15 mini charms together to create your outer fabric measuring 6½ x 10½’’.  Iron on two (2) pieces of fusible on the wrong side and then quilt as desired.  For this sample, I quilted lines about 3/8'' apart.

Pin 6'' zipper to quilted outer fabric with two pins on either end making sure either ends of the zipper are the same distance from the edge. As always, you can start with a larger zipper and then add a fabric zipper tab at the bottom to size it correctly.


Pin the lining fabric (right sides together) to the zipper and sew zipper.  Make sure you start and stop roughly 3/8 '' from each edge.


Open zipper and pin quilted outer fabric to the other side of the zipper.  Pin the lining fabric (right sides together) to the zipper and sew zipper.  Remember to start and stop roughly 3/8'' from each edge.


This is an important step and if you are used to making bags with two pieces of fabric, it could be confusing so take a moment to really look at the photo below.  See how the quilted outer fabric is right sides together and how the lining is right sides together - each making a shape like a tear drop?


Once things are sewn, it will look like this.  Look carefully in the photo below.  The zipper is open all the way and you can see how the lining and the outer fabric are attached.


On the edge of the bag with the closed zipper end, find center of quilted outer fabric by folding and putting pin in fold to mark center..   Fold over aligning center of zipper tape with the pin marking center of the quilted outer fabric.    Fold back the lining similar to what was done in the boxy bag.  Sew.


Repeat for lining, again this is the same technique we used in boxy bag to first sew the outer bag and then the lining. You do want to catch the zipper tape in both.


Now you've got a nice neat seam on the bottom of your triangle bag.


To secure the top, you are going to fold the lining and the outer bag fabric in half and pin.   Leave about 2 or 2½'' from folded edge of lining open and sew from this point across lining, zipper tape and to the edge of the quilted fabric.    See where that blue pin is on the lining fabric?  That is the staring point.


This is what it will look like before you turn it right side out.


Carefully push the bag right side out through the gap in the lining.  (Always feel like there should be a drum roll for this step!)


Ta Da!!  Look what you made!

triangle zip bag tutorial

Secure the gap in the lining either by hand or machine.

I had some leftover flying geese blocks lying around - they made a quick and fun triangle bag!

triangle zip bag tutorial

And since I had more charm squares left, I just need to made another!

triangle zip bag tutorial

There are lots of options here.  For this last bag, I used a piece of twill tape to make a handy pull to hold onto while you unzip the bag.  I just sewed it into the seam on that last step.

Aren't these fun?  I'll be back with one more post on triangle bags to discuss some size options.

triangle zip bag tutorial


This post was sponsored by Zipit, an Etsy store as part of the Bag It event in 2015.


Have a wonderful day! Patty