Wednesday, March 30, 2016

Words are!!

Harry Potter quote Words are

Happy dance!

What do you think?

The quote is a favorite of my daughter's from Harry Potter by Dumbledore. .

Words are, in my not so humble opinion, 

our most inexhaustible source of magic."


Great quote for a writer, isn't it?

I've managed to create all the words for my daughter's dorm quilt for the fall.  (Her freshman year!)  I am going to applique on the two commas because I wasn't happy with the paper pieced commas.

This is laying on the floor of my sewing room.  I need to start building out the rest of the quilt.  The words with their borders are 7'' high and a twin XL (standard fare for dorm rooms) means a quilt that is at least 65 x 93''.

Dear Stella Palladium
Photo Credit: Hawthorne Threads
Didn't take too much math to realize that I needed more fabric.   I was making this quilt from a FQ bundle I'd won several years ago in a blog contest and using primarily just the low volume prints.   The selvage told me it was a Dear Stella line but not the name of the line or the year.

A bit of detective work with google and I figured out that I was using the Dear Stella Palladium line and with that info, I even found the blog post from Jaybird quilts announcing the winners of the blog contest.

Guess what?

There were two winners from Jaybird Quilts contest and I emailed the other winner, Mary Ann, to see if by chance she had any of the fabric left.

She did!  And she generously (extremely generously) sent it all to me!

Thank you Mary Ann!!!

Time to get the rest of the quilt top together!

This was my OMG goal for March (goal post).  I'll be linking up with a finish post here.


Linking with Blossom Heart QuiltsFreemotion by the River.  QuiltfabricationQuilt StoryLadybug Blessings and Sew Fresh Quilts .


Have a wonderful day! Patty

Monday, March 28, 2016

Bargello QAL - Let's Party!

Bargello Quilts in progress

Let's party!

Bargello quilt tops have been showing up in the Elm Street Quilts Facebook page.  Credit in above photo to (starting from the top) Laraine, Laura, Jen, Terry & Alida.

Miss any of the QAL posts? Find the full list here.

The linky party is now open.  You can link up a photo of a bargello - whether you've quilted it or not!  You get an entry for each of the bargellos you made during the QAL - made 2?  Two entries!  Seriously addicted and made a third?  3 entries for you!

If you don't have a blog or have trouble uploading a photo, just email it to me at elmstreetquilts at gmail dot com and I'll enter it for you!

Prizes will be randomly awarded to three participants who enter a bargello - quilted or not - into the linky party or send me an email.  All entries linked (or received via email) by 11:59pm on April 22 are eligible!

I've had so much fun with the QAL and each time I see a bargello on instagram or Facebook, I just grin.  They all look wonderful!

American Made Brand solids, one of my blog sponsors, has a collection of 75 beautiful colors of fabric completely manufactured in the United States - from the cotton to the finished fabric!  The fabric has deep rich color and I love the feel of the fabric (the hand.)  My large Bargello was made exclusively of American Made Brand solids from my stash.

 American Made Brand is providing two fat quarter bundles of these beautiful colors.


Fat Quarter Shopone of my blog sponsors, offers a tremendous selection of fabric and very beautiful (and tempting!) block of the month offerings.  Fat Quarter Shop offers fabric from many different manufacturers and you can find anything you are looking for there! 

Fat Quarter Shop is providing a fat quarter bundle of Riley Blake Small Gingham.


Share your progress on your blog, via Instagram - use #elmstreetquilts and #bargello as our social tags.

Join the new Elm Street Quilts QAL Facebook group and share your progress!  It has been so much fun to see the bargellos progressing!.


    My thanks to the wonderful people at American Made Brand for sponsoring this Bargello QAL.


    Have a wonderful day! Patty

    Bargello QAL - Quilting your Bargello


    How goes the assembly of your bargello quilts?   There is still plenty of time to join the QAL.  There have been two key posts so far:
    • sew together those strips, make a tube & press [post link]
    • cut into new strips, rip out specific seams (according to the pattern) & sew back together [this post]
    Today, we are discussing ways to quilt your bargello.


    The key to quilting a bargello is to quilt it in a way that reinforces the flow of the design.

    For both of my bargellos, I choose to using my walking foot and follow along the bargello curve.

    I wasn't worried about evenly spaced lines - in fact, I think the fact that they are randomly spaced adds to the motion.  And I wasn't worried about a perfect following of the curve - echoing the movement was the goal.

    Quilting pattern for bargello

    For the Baby B, I used a single thread color because it blended well with all of the fabrics.  For the Queen B, I used a light gray over the colored solids and then restarted the line to use white so everything blended.  (If you look carefully here, you can see where I made an oops! )


    This technique took awhile and made for lots of threads that needed to be buried but I liked the final result.

    Quilting pattern for bargello

    Here is another view of the quilting from the back of the Baby B.

    Quilting pattern for bargello

    I started a pinterest board with other Bargello quilting examples.

    I'm looking forward to seeing what you create!

    The linky party is now open!!  Share a photo of your bargello - quilted or not - by April 22 to be entered into the random drawing of the prizes from our sponsors.  Join the linky party HERE.

    Share your progress on your blog, via Instagram - use #elmstreetquilts and #bargello as our social tags.

    Join the new Elm Street Quilts QAL Facebook group and share your progress!  It has been so much fun to see the bargellos progressing!.


      My thanks to the wonderful people at American Made Brand for sponsoring this Bargello QAL.


      Have a wonderful day! Patty

      Wednesday, March 23, 2016

      A Wedding Celebration Quilt

      My nephew is getting married in October and I want to make a quilt as a wedding gift.  I've been trying out all different ideas in EQ7 and keep coming back to blocks that involve Flying Geese - my favorite block.

      I'm going to be using this yummy fat quarter bundle called Blueberry Park.  These designs are actually printed on top of Kona solids - something I've not seen before.   I'll use a solid white white as the background fabric since all those designs are a very bright white.  The binding will be from the darkest color which is called Indigo.

      Blueberry Park Fabric for Flying Geese Quilt

      (Isn't breaking open that FQ bundle a tough thing to do?  It always looks so pretty all tied up together.)

      A few days ago, I saw this video from Missouri Quilt company  for a block Jenny is calling Tangled Geese.   Isn't this a fun block?   Her tutorial is great for using a jelly roll but since I'm starting with FQs, I can use my favorite 'no-waste' method for Flying Geese.

      I've got some more work to do on planning because I want to think about whether I let it all go random colors or move the color from dark to light.

      I'm still a novice in using EQ7 but I'll hopefully be able to figure out how to trying out different color patterns without too much work.

      But the best part, since I know I want a quilt with geese, I can get started making some geese.  Decisions on color placement can come later.

      Have a wonderful day! Patty

      Monday, March 21, 2016

      Bargello QAL - Assemble your Quilt top


      Happy Bargello Sewing Day!

      Not a national holiday?  Well it should be!

      Bargello Quilt

      The bargello assembly for the QAL is broken into two posts to give everyone the time they need to get things done:


      bargello QAL
      Fabric Strip Tube
      • sew together those strips, make a tube & press [post link]
      • cut into new strips, rip out specific seams (according to the pattern) & sew back together [this post]


      At this point, you should have a collection of fabric strip tubes.  For the Queen B, you have four fabric strip tubes (two fat and two skinny).  For the Baby B, you have two fabric strip tubes.


      Please read this post all the way through to get the full instructions as well as important tips for assembly.

      And before you actually cut anything, make sure to review how to read a bargello cutting chart.  (These cutting instructions are just an example and are NOT the instructions for the actual QAL.)

      Don't hesitate to ask questions in the comments, by email, or come join the Elm Street Quilts QAL Facebook group and ask your questions there.

      Before going any further, just a few words on organization and bargello sewing tips.

      organizing bargello
      Label your strips with the column number after cutting.
      Handle the strips as little as possible to avoid seam pops.
      Alternatively, clips with paper labels work well too.   Just label each strip after cutting.

      Your strip tubes should lay flat with little coaxing from you.
      Before taking your first pattern cut, even off the edges and discard.

      Cut only 2 or 3 strips before stopping to label them with the column number.

      Following the cutting instructions, slide your label to the top fabric for that column and fold your tube with that fabric on top.
      In the Queen B fabric, column 20 is fabric #12 which is 7 white strips above the #1 fabric.

      Lay out the tube strips on a table (or floor) leaving gaps to fill in with the even strips.

      Tips for sewing a bargello
      See how the design fills in when you add the even numbered rows?  These are still tubes.

      Carefully pull the seam to separate the tube back into a strip.
      Handle as little as possible to avoid seam pops.

      Tips for sewing a bargello
      Once you've broken your tube into strips, lay them right side up.
      Continue to label each strip with a column number.
      Stay stitch the left and right sides of your quilt top to prevent popped seams

      Finally, once you cut, handle the strips as little as possible to avoid popping seams.  This means:

      • iron only at the very, very end once everything is sewn 
      • put a line of stitching very close to the edge (i.e. staystitch) of the left most and right most fabric to secure seams
      • if your seams are not nesting properly - STOP - you've likely got a strip turned upside down
      • continue to use a smaller stitch (i.e.  a 1.4) for your seams.

      All those sewing and organization tips make sense?

      Ready for the magic?

      Let's get started!

      Separate your fabric strip tubes into two piles and mark one pile as'odd' and the other as 'even'.

      • For the Baby B, each pile will only contain one tube - this is easy!


      • For the Queen B, each pile will have on fat strip set (i.e. ~ 21'' wide) and one skinny strip set (i.e. ~10'' wide).  Make sure that the tubes in each pile are pressed the same way.   (For example, the fat and skinny strip each pressed towards the top fabric go into the same pile.)


      Follow the cutting instructions and cut the odd columns from the pile marked 'odd' and the even columns from the pile marked 'even'.  The cutting instruction will contain the information you need to know the width of the strip and which fabric is the top fabric for the design.

      • Download and print your cutting charts  (drop me an email - elmstreetquilts at gmail dot com - if you have any trouble downloading.)


      Bargello cutting chart

      After cutting 2 or 3 strips from the tube, make sure you label the strip with the column number before cutting further.  (see photo below, top right)  


      Rotate tube and move marker / label to the top fabric for the design.  (see photo below, bottom left)

      Use seam ripper to carefully remove seam.  (see photo below, bottom right.)

      bargello QAL instructions

      Once all the strips are cut and appropriate seams removed, lay the bargello following the pattern next to your machine.  Visually double check you've got the design you want.

      Sew together columns, using 1/4'' seam.   Carefully nest seams at each intersection.  Because of the pressing, seams should nest naturally.

      Staystich the outside edges. Press.


      Congratulations!

      You just made a bargello quilt top!

      Next week, we'll discuss ways to quilt your bargello.  Until then, please share your progress on your blog, via Instagram - use #elmstreetquilts and #bargello as our social tags.

      Join the new Elm Street Quilts QAL Facebook group and share your progress!  It is going to be a lot of fun to see how everyone is doing!.


        My thanks to the wonderful people at American Made Brand for sponsoring this Bargello QAL.


        Have a wonderful day! Patty

        Friday, March 18, 2016

        Bargello QAL - How to Read a Cutting Chart

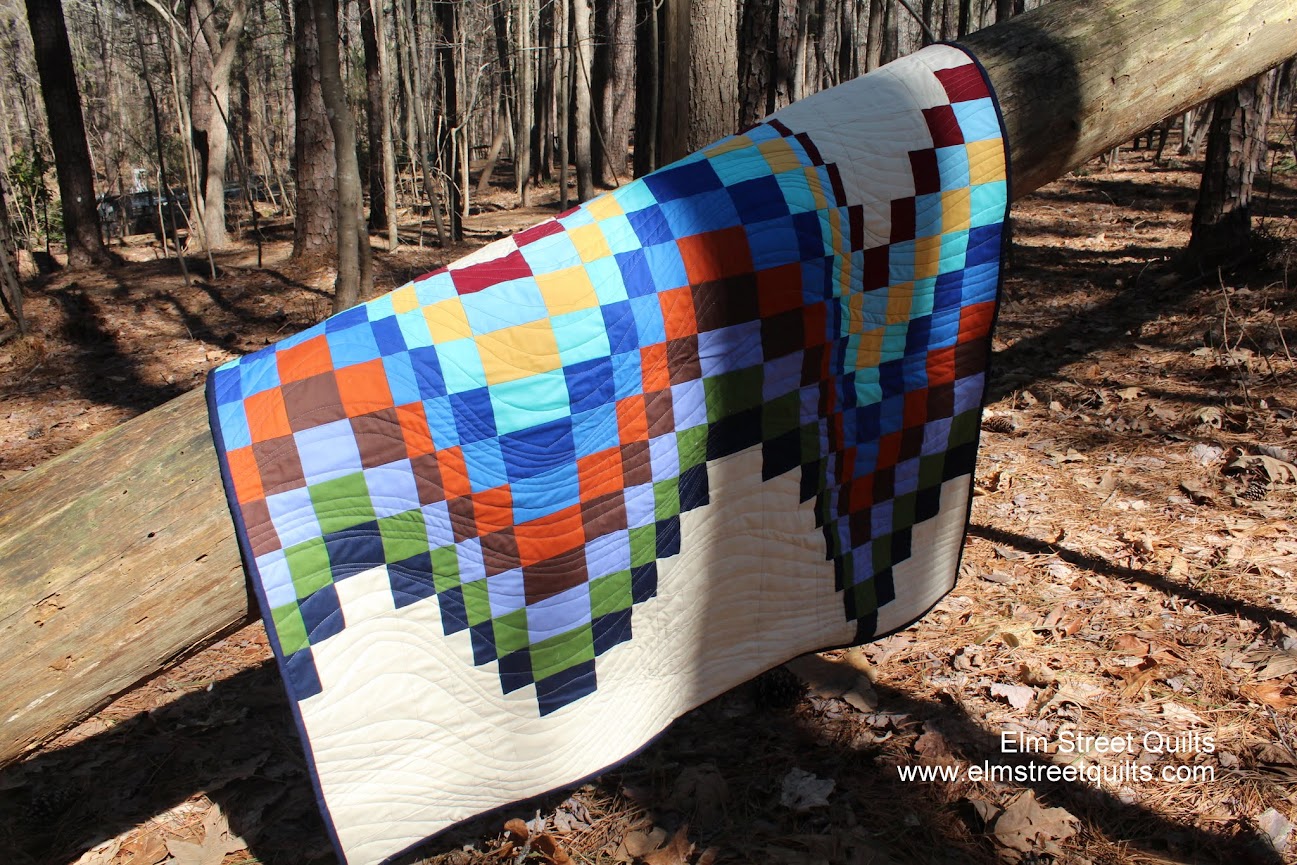
        Welcome to a extra post in our Bargello QAL!

        Bargello quilt QAL

        In case you are just catching up, you can make either the Baby B - finishes at 16'' - or the Queen B - finishes at 36''.   We've got terrific prizes available (see sponsor introduction) for three lucky random participants.  You've plenty of time to join in - linky party runs from March 28 through April 22.

        Fabric requirements (Queen B or Baby B) and the first step of the Bargello assembly  is available.

        The final step of the Bargello assembly posts on Monday and will contain the Bargello cutting charts for the Queen B and the Baby B. 

        Before that post, I wanted to do a quick tutorial on how to read the Bargello cutting chart so everyone is ready to go.  

        Please ask questions in the comments and consider joining the new Elm Street Quilts QAL Facebook group and share your progress!  It is going to be a lot of fun to see how everyone is doing!.


        To be clear, this is NOT the actual cutting chart for the QAL. 

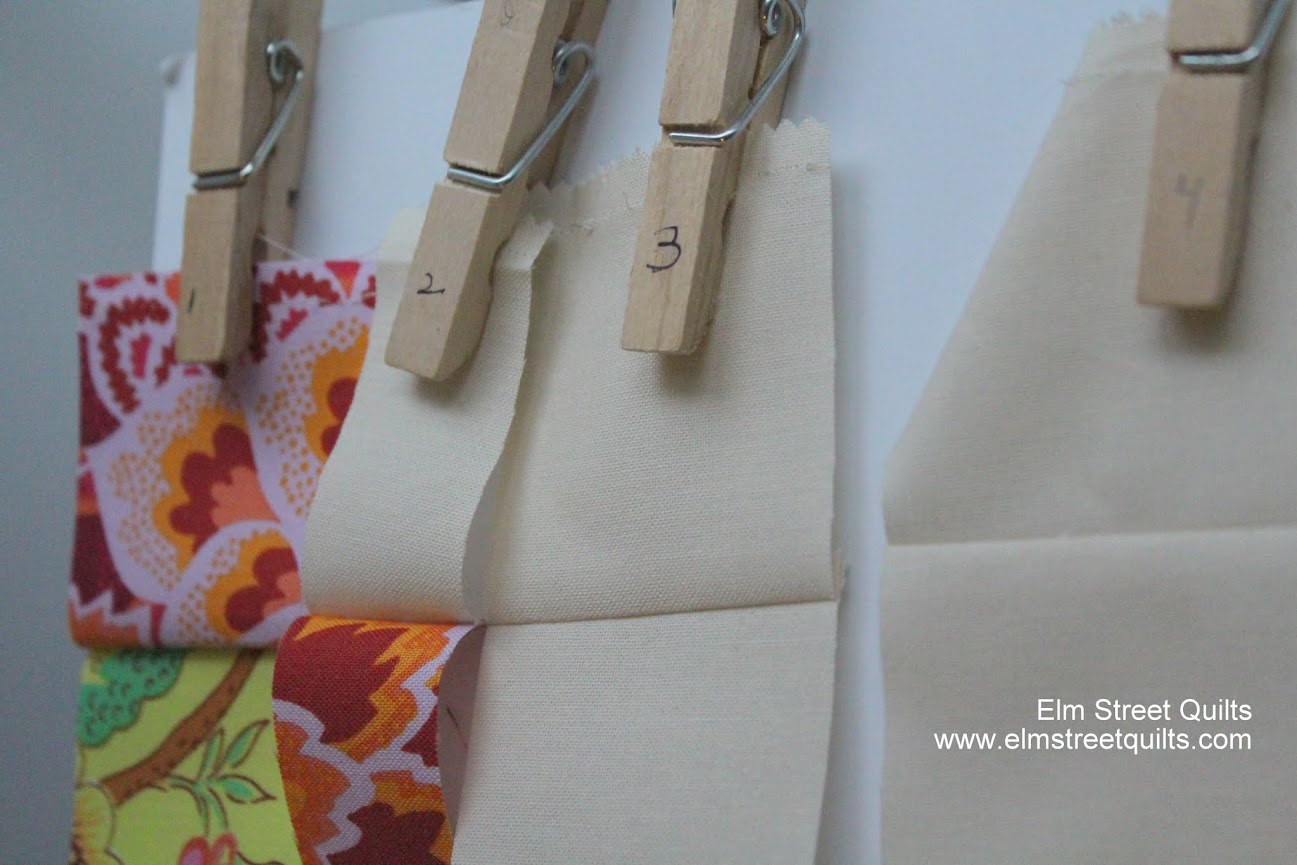
        Let's learn how to read a bargello cutting chart with this example sample.  There are are 7 fabrics - red, yellow, blue, purple, white, white & white.   Red is the #1 fabric.


        Bargello assembly  results in tubes of strips, one group has seams pressed towards the #1 fabric and the other group has seams pressed away from #1 fabric.  Label one group ODD and one group EVEN.

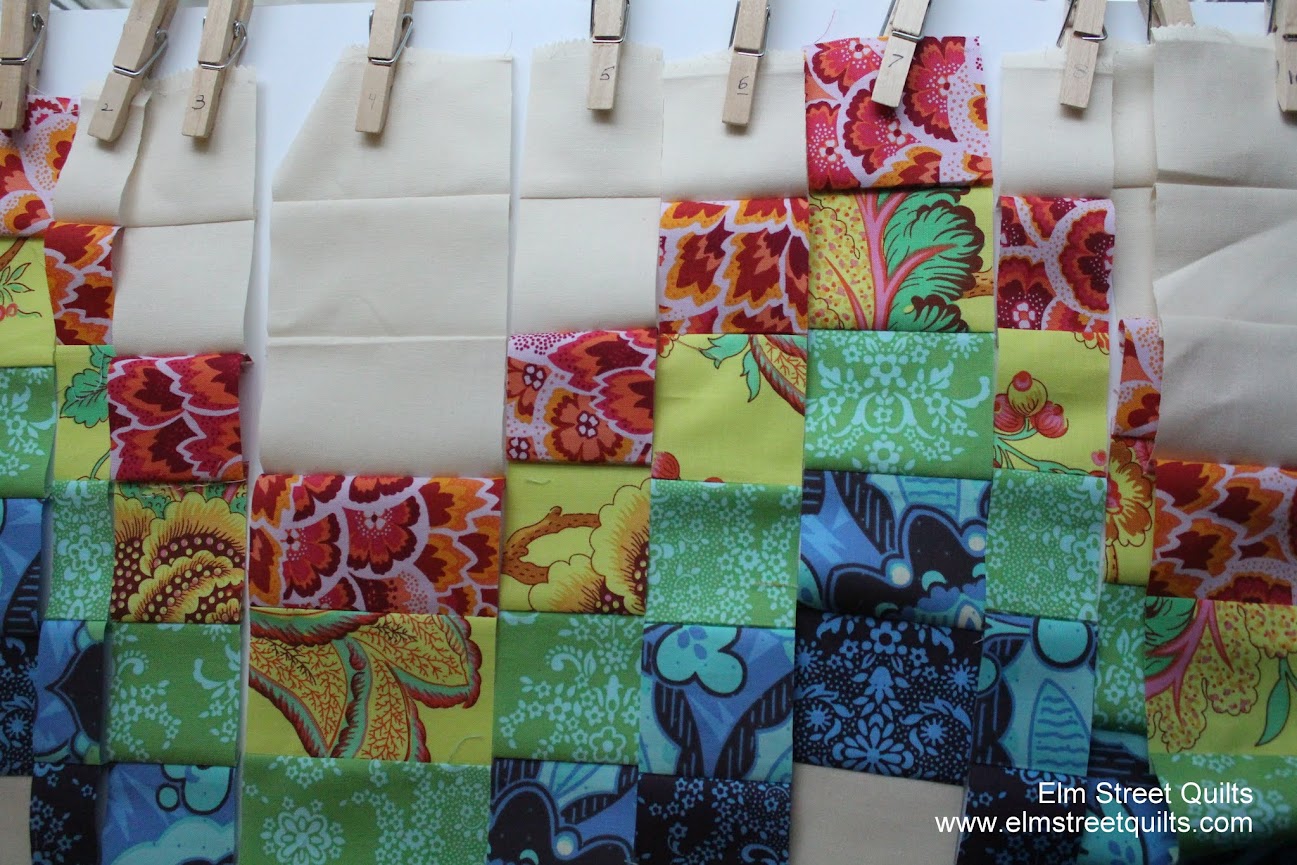
        You'll cut the odd numbered columns 1, 3, 5 and so on from the ODD group. Even numbered columns 2, 4, 6 will be cut from the EVEN group.  (The fact that each group pressed differently allows the seams to nest.)


        There are two cutting charts - one labeled ODD and one labeled EVEN.

        The cutting instructions tell you how wide to cut the width of fabric and which fabric is the first fabric for that column.  Since we've got several background strips, the table also tells you how many white squares are above your #1 (my red) fabric.

        Here are columns 1, 3, 5 and 7 from this example sample and the cutting table for the ODD numbered columns.

        To be clear, this is NOT the actual cutting chart for the QAL. 


        Let's look at the column circled in the graphic below.   Now read across in the ODD table where the circle is.  A strip was cut from the tube of a width of 1 and the first fabric is #6.  There are 2 white squares above your #1 (my red.)


        To be clear, this is NOT the actual cutting chart for the QAL. 


        Once you cut your odd columns, your start with a tube (pressed opposite direction) and cut your even fabrics.  In my sample example, the only thing that changes is the strip width.

        This sample all has the #7 fabric as the first fabric which means there is one background square above the #1 (my red.)

        To be clear, this is NOT the actual cutting chart for the QAL. 


        Once all your strips are cut and seams separated, you can lay your bargello out on your sewing table and sew together, nesting those seams.


        Any questions?

        Monday's post will feature a printable version of the actual cutting charts for the Queen B and the Baby B along with important tips and some helpful photos.

        I hope you are having fun - I know I am!

        My thanks to the wonderful people at American Made Brand for sponsoring this Bargello QAL.


        Have a wonderful day! Patty

        Wednesday, March 16, 2016

        Inexhaustible


        I made it through inexhaustible!!!!

        That word alone is about 40'' wide.   I'll be building out the other strips to be the same width.

        I think this will make a great dorm quilt for my daughter when she travels off for her freshman year of college in the fall (sniff).

        The quote is a favorite of my daughter's from Harry Potter.

        Words are, in my not so humble opinion, 

        our most inexhaustible source of magic."

        I've got source of magic left.  I think magic will be in all caps.

        I'll be linking at  Blossom Heart Quilts,  Sew Fresh Quilts and Freemotion by the River.


        Have a wonderful day! Patty

        Monday, March 14, 2016

        Bargello QAL - Assembly Begins

        Ready to sew your Bargello?

        Last week, we talked about the fabric requirements for the Baby B and the Queen B.  You've got your 2 1/2'' strips and they have been living on your design wall.


        The bargello assembly for the QAL is broken into two posts to give everyone the time they need to get things done:


        • sew together those strips, make a tube & press [today's post]
        • cut into new strips, rip out specific seams (according to the pattern) & sew back together [next week]


        How about that?  Use of a seam ripper is actually part of the process.
        Before going any further, just a few words on organization and bargello sewing tips.


        Keep track of the order of the fabric in the bargello - use a clothespin labeled with a sharpie to secure the strips before sewing.


        Line up fabrics to give contrast between neighboring pieces. Make sure your first fabric (#1) and your last are very different to avoid becoming confused during assembly

        Use a small stitch length when you sew these strips to avoid some seam pops at the edges. Sew your seams together with a CONSISTENT seam allowance - 1/4''.  Consistent is really the key part so your seams will nest properly.

        Don't worry about aligning edges - you'll trim later.
        Got all that?

        1. Stay organized.  Keep track of the order that you are sewing your strips and stay consistent.
        2. Your first fabric (#1) should be very different from your last color/print strip to avoid confusion later. 
        3. Use small stitch length (ex: 1.4) to avoid seam pops and stay consistent on your on seam allowance.
        4. Don't worry (be happy) about aligning those edges.  We'll trim this up next week.


        Ready?

        Now let's get sewing.

        For the Baby B, bring your fabrics 1 through 8 to the sewing machine and sew together your strip set.  Make two (2) strip sets.  Each strip set should measure (roughly) 21'' wide and 16 1/2'' tall.


         Press the seams towards your #1 fabric in one strip set and away from the #1 fabric in the other strip set.  (Red is my #1 fabric.)   (Close up photo of pressing.)
        Then make a tube - instructions continued below.
            
        ****************************************************

        For the Queen B,  bring your fabrics 1 through 18 to the sewing machine and sew together your strip set.

        Make three (3) of these strip sets.  Each strip set should measure (roughly) 21'' wide and 36 1/2'' tall.
        Cut one (1) of these strip sets in half yielding two (2) pieces that are (roughly) 10'' wide and 36 1/2'' tall.  You'll now have two groups (1 fat and 1 skinny) of strip sets.  Press towards the #1 fabric for one set and press away from the #1 fabric for the second set.  In these diagrams, red is my #1 fabric.  (Close up photo of pressing.)

        Then make a tube - instructions continue below.
            
        ****************************************************

        Don't they look pretty?


        Once you've assembled your strip set, fold your strip set in half, right side together.  Your #1 fabric should align nicely with your last fabric.

        Since there are an even number of strips (18 in the Queen B and 8 in the Baby B), the strip set will just fold naturally over on the stitching.  Do not try to align the sides - just fold in half and pin to make sure the #1 fabric and the bottom background strip doesn't shift during sewing.


        You'll end up with a tube as shown in the photo below.   Make a tube for each of your strip sets.

        bargello quilt along strip set

        Then chill until next week's instructions!


        In summary, here are the steps:

        Baby B:


        1. Lay your 2 1/2'' strips on a design wall or a table in the order you want to them to appear in the quilt.  Pay particular attention to your top and the strip right before the background fabric to make sure they don't look anything alike.  (You'll thank me later!)
        2. Using a clothespin or label, mark each of the strips with the numbers 1 through 5
        3. Sew the strips together following your order and including the 3 background strips.  Use a consistent 1/4'' seam allowance and a small stitch length to prevent seam pops.
        4. Make two (2) of these strip sets. Each strip set should measure (roughly) 21'' wide and 16 1/2'' tall.  Press the seams towards your #1 fabric in one set and away from the #1 fabric in the other.   (Close up photo of pressing.)
        5. With each strip set, make a tube by carefully folding in half (right side together) and pin the #1 fabric to the bottom background fabric.  


        Queen B:

        1. Lay your 2 1/2'' strips on a design wall or a table in the order you want to them to appear in the quilt.  Pay particular attention to your top and the strip right before the background fabric to make sure they don't look anything alike.  (You'll thank me later!)
        2. Using a clothespin or label, mark each of the strips with the numbers 1 through 11
        3. Sew the strips together following your order and including the background strips.  Use a consistent 1/4'' seam allowance and a small stitch length to prevent seam pops.
        4. Make three (3) of these strip sets.  Each strip set should measure (roughly) 21'' wide and 36 1/2'' tall.
        5. Cut one (1) of these in half yielding two (2) pieces that are (roughly) 10'' wide and 36 1/2'' tall.  You'll now have two groups (1 fat strip set and 1 skinny strip set) of strip sets.
        6. For one group (i.e. the set of 1 fat & 1 skinny), press the seams towards your #1 fabric.  Press away from the #1 fabric in the other.   (Close up photo of pressing.)
        7. With each strip set, make a tube by carefully folding in half (right side together) and pin the #1 fabric to the bottom background fabric.  You'll have four tubes - two fat and two skinny.


        Next week, we'll talk about the actually assembly of your bargello quilt top - the magic of this process.

        What is the magic?  It is the math behind the next set of strips you will cut from the tube - the width of the strip and where you rip the seam.

        bargello qal strip set


        Enjoy getting these strips sets together.

        Instagram your progress with #elmstreetquilts and #bargello as our social tags.


        Join the new Elm Street Quilts QAL Facebook group and share your progress!  It is going to be a lot of fun to see how everyone is doing!.


        My thanks to the wonderful people at American Made Brand for sponsoring this Bargello QAL.

        Have a wonderful day! Patty