Sometimes all you need to carry is a few credit cards - this credit card carrier sews together quickly. It would also be fun to make one and gift it with a gift card to someone's favorite shop! I used fabric from Island Batik for the credit card carrier shown on top.
Supplies you will need - (supply source information)
# pieces
|
Dimensions
(height x width)
|
|
Primary fabric (front)
|
One (1)
|
4 x 4 ½ ‘’
|
Lining fabric (back)
|
One (1)
|
4 x 4 ½ ‘’
|
Pocket #2 fabric
|
One (1)
|
4 x 4 ½ ‘’
|
Pocket #1 fabric
|
One (1)
|
5 x 4 ½ ‘’
|
Tab fabric
|
One (1)
|
4 x 3 ‘’
|
Fusible interfacing
(medium weight)
|
One (1) each
|
4 x 2 ½ ‘’ for
tab
1 ¾ x 4’’ for
pocket #2
|
Fusible Fleece
|
One (1) each
|
2 x 4 ‘’ for
pocket #1
3 ½ x 4 ‘’ for
fabric front
|
Pair of Hidden Magnetic Snaps
|
Two (2)
|
12 mm
|
Prepare Primary Fabric and Pocket #2
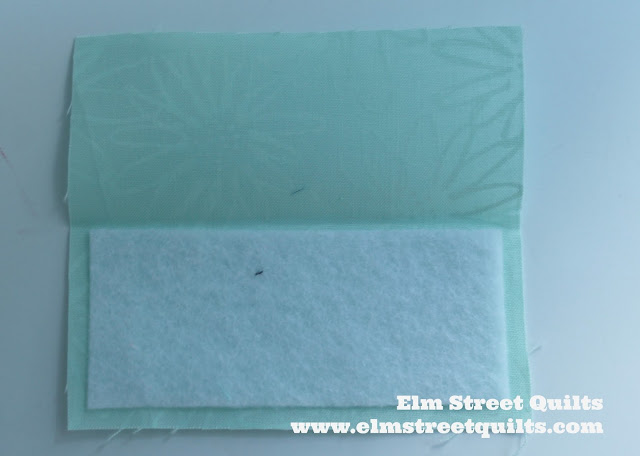
Pocket #2 is the pocket that is only partially visible as it is hidden by pocket #1.
Iron fusible fleece on wrong side of primary fabric, centered,
leaving a ¼ ‘’ border around edge to reduce bulk in seams.
Fold Pocket #2 in half (measures 2 ‘’ high by 4 ½ ‘’ wide)
and press fold. Open and fuse interfacing
for pocket #2 below the fold.
Sew a line of top-stitching across top of pocket #2.
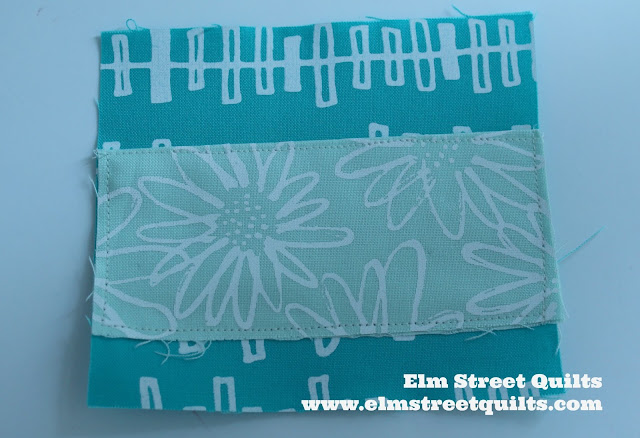
Place Pocket #2 on primary fabric 1 ¼ ‘’ from top. Secure with line of stitches across
bottom.
Prepare Pocket #1
Fold Pocket #1 in half (measures 2 ½ ‘’ high by 4 ½ ‘’ wide)
and press fold. Open and fuse fusible
fleece for pocket #1, aligning below the fold.
Fusible fleece should leave a ¼’’ border across bottom and sides.
Mark center on bottom edge.
Sew hidden magnetic snap to fusible / pocket #1 unit ½ '' from bottom. Review magnetic snap tutorial for tips on installation.
Sew hidden magnetic snap to fusible / pocket #1 unit ½ '' from bottom. Review magnetic snap tutorial for tips on installation.
Refold pocket #1 at fold line and sew a line of top-stitching
across top of Pocket #1.
Your pocket #1 now has one side with fusible plus the hidden magnetic snap and one side that is just fabric. Place pocket #1 fusible side down onto primary fabric and on top of pocket #2, aligning bottom edges. As you can see in photo (below left) your stitching from the magnetic snap is not visible.
Your pocket #1 now has one side with fusible plus the hidden magnetic snap and one side that is just fabric. Place pocket #1 fusible side down onto primary fabric and on top of pocket #2, aligning bottom edges. As you can see in photo (below left) your stitching from the magnetic snap is not visible.
Sew a line of stitching very close to edge of sides and
bottom to baste both pockets to primary fabric.
Prepare tab
Center fusible interfacing to wrong side of tab fabric and
secure with iron. Fold fabric in half,
right sides together, and sew around bottom edge and one side.
Turn inside out to get a tab that measures 4 ‘’ high and 1 ¼ ‘’ wide. Press to flatten if necessary.
Using tweezers, insert hidden magnetic snap into tab,
pushing it all the way to the bottom edge.
Place tab over pocket #1 and determine which side should
face up. One side of the magnet will
adhere, one side will repeal. (See
magnetic snap tutorial.)
Baste top of tab to top of primary fabric, making sure it is
centered. Trim off excess tab.
Final assembly
Place lining fabric over primary fabric unit, right sides
together and pin.
Sew around all sides, leaving gap for turning.
Turn right side out.
Pin gap closed and top stitch all the way around edge.
Fill with credit cards and go off fabric shopping!

I'll be linking my Bag It tutorial with Sew Cute Tuesdays, , Freemotion by the River, WIP Wednesday's, Let's Bee Social, Midweek Makers. Fabric Frenzy Friday, Finish it Up Friday and Finished or Not Friday.
Have a wonderful day! Patty


Best credit card carrier ever. Beautiful. Thank you for an excellent tutorial. I'm looking forward to making plenty of these. Perfect gift items too!
ReplyDeleteQuiltShopGal
www.quiltshopgal.com
You're absolutely right! Bet you could add a little strap to the corner, too, and make it a little wristlets! Thanks, Patty! Enjoy your day!
ReplyDeletewould it be safe enough as wristlet? maybe as a start of a wallet/wristlet.
DeleteThank-you for a great stocking stuffer idea. I like how you did the snap. Maybe the next time you might want to take more time with the tab. I noticed the corners are not square. Some of us are doing this to get good tips and to help improve our sewing.
ReplyDeleteThis is a great gift idea - gonna get right on it! Thanks so much for sharing it.
ReplyDeleteIs there a possibility that you could put this project into a printable format? It's lovely and I'd like to make it, I really don't want to haul the computer and/or to the other room. My house is very small.
ReplyDeleteCathy, most of the bag tutorials should be available as a pdf download for a small fee very soon. Thanks for asking!
DeleteFantastic little holder. I can think of several people who would love one. (Can't we all?) Your directions are very clear and easy to follow. Cathy, I opened this webpage on my phone and used it to follow along. I found it worked very well since I read the directions on the computer carefully before going into the studio. Patty, thanks again for the tutorial!
ReplyDeleteThis looks like a fun one Patty, maybe I can get one done before Christmas ;)
ReplyDeleteWhat a neat tutorial Patty and this is something everyone can use! Thanks for sharing!
ReplyDeleteLove this holder! Thanks for the tutorial! We featured your tutorial over on the FWFS blog! Thanks for stopping by and linking up!
ReplyDelete-Lindsey
http://fortworthfabricstudio.blogspot.com/2016/10/fabric-frenzy-friday-features_25.html
Hello, this looks great. I'm just wondering: won't the magnetic snap interfere with/damage the magnetic stripes on the cards?
ReplyDeleteBeatrice, I replied via email but posting here in case others have the same question. There is a layer of fleece between the magnet and anything you put inside so there should not be an issue based on the research I did. (To do damage, the magnet needs to be in direct contact with the card.) But if concerned, use velcro or just make sure your cards are facing up.
Delete