Friday, November 6, 2015

Bag It - Size Options

(This post was originally published as part of the 2015 Bag It event.)


Today we are going to explore some basic options for the Basic Zip Pouch that started off our week.

Clearly fabric choices are endless.

As are quilting options.

But you've also got several different options for finishing those corners that will give your bags a different size and make them better suited for specific purposes.

See these great looking bags below?  They all started out with the same dimensions we talked about on day 1.

The difference is whether and how much the corners were boxed.  (The boxy corner tutorial post is here.)


Starting from the back, the measurements are as follows:
  • Charm pack bag is 4 '' high and 5 1/2'' wide.  The corner's were not boxed.
  • Measure tape bag is 3 1/2 '' high and 5 '' wide.  The corners's were boxed at 1/2 ''.
  • Gray bag is 3 '' high and 3 1/2 '' wide.  The corner's were boxed at 3/4''.
(Note - In all cases, the width measurement is the bottom seam measurement.)   


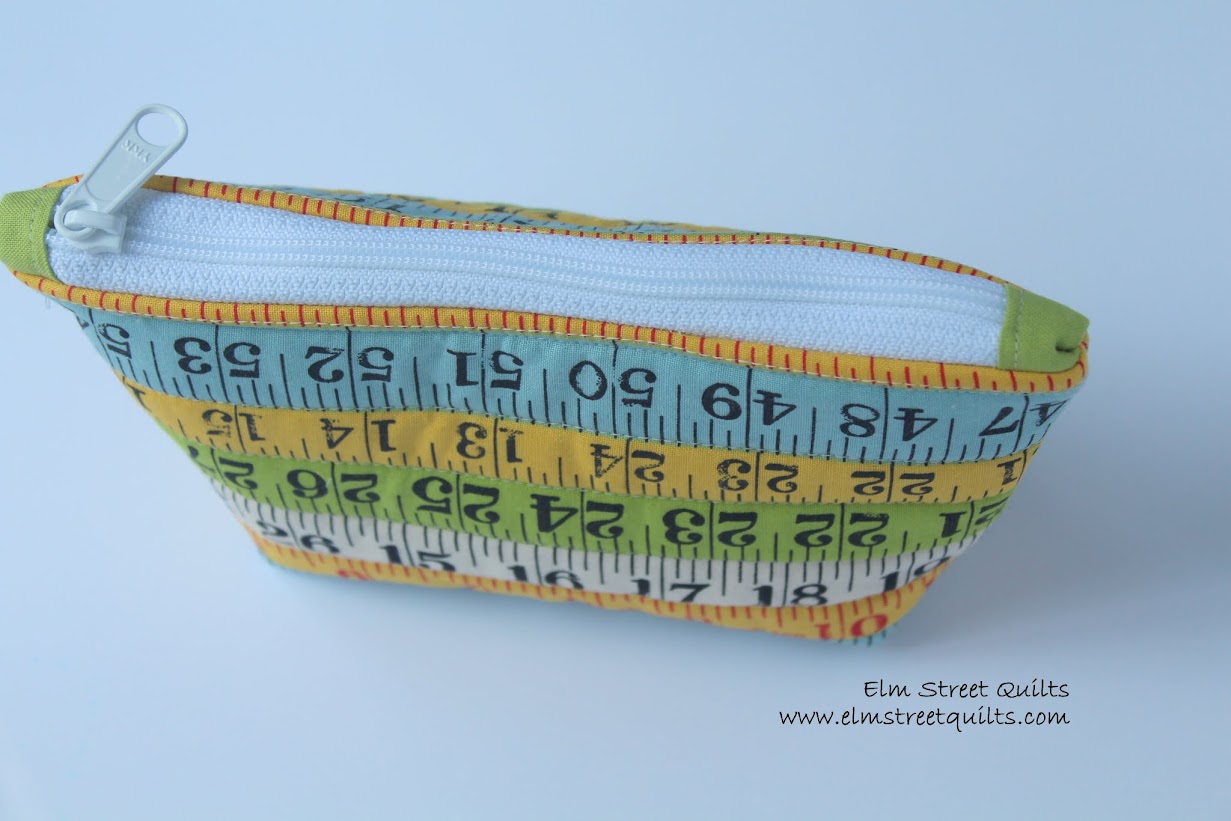
I just loved that bag with the measuring tape so I made a second in a larger size.  Same instructions as our basic zip bag except start with fabric pieces for outer and lining cut at 8½'' x 6½''. 

If you want to cut a zipper to size by adding fabric zipper stops, your zipper should be at least 9''.  If you want to use a zipper without the fabric zipper stops, then choose a 8'' zipper.

The larger bag was boxed at 1 ½''.


They look like a father / son pair sitting there, don't they?  (Or is it mother / daughter?)

Plenty of room inside for lots of good things!

zip bag tutorial

I made another one - this time using fabric scraps.  (More on that next week.)

zip bag tutorial

The one on the left was boxed at 1  1/2'' and finished at 4'' tall and 5'' wide.

The bag on the right was boxed at 1'' and and measures 4 1/2 '' tall and 5 1/2 '' wide.


Are you enjoying this series as much as I am?

I hope you've got great plans to make and share bags.

See the Elm Street Quilts Bag It information page for more information.


This post was sponsored by Zipit, an Etsy store.


Have a wonderful day! Patty


Fabric credits:

  • Charm Square - Outer: Moda Fig Tree Mini Charm Pack; Lining Moda Sweetwater Noteworthy
  • Mini Gray - Outer: Moda Sweetwater Road 15,  Lining: Moda Sweetwater
  • Solids - AMB Olive, Dark Gray, Light Navy, Dark Rust, Dark Gold, Dark Orange plus 7'' metal zipper 
  • Tape - Moda American Jane, Lining AMB Lime

Have a wonderful day! Patty


Wednesday, November 4, 2015

Bag It - Boxing those corners


(This post was originally published as part of the 2015 Bag It event.)


Remember the lovely bag from Monday?  It finished at a great size of 4 x 6''.


Let's start over with the same 'ingredients' and by boxing the corners get a bag that stands on its own!

I've made this bag with a piece of fabric but you could use mini charms too!

You'll need the following (same as basic zip pouch)

  • two (2) pieces of outer fabric at 4½ x 6½''
  • two (2) pieces of lining fabric at 4½ x 6½''
  • four (4) pieces of fusible fleece each at  4½ x 6½''
  • one (1) zipper at least 7'' long.  (NOTE - this tutorial assumes you are cutting your zipper to size as per thetutorial.  If you didn't want to do this, use a 6'' zipper.)

Follow all the basic instructions in the basic zip pouch tutorial except before the bag is turned inside out, we've added a step!


So assemble your bag and sew right sides together, leaving a gap for turning it inside out.


Line your ruler against the stitching line and draw a box 3/4 '' by 3/4 ''


Do this for both corners of the outer fabric and both corners of the lining.


With a small scissor, cut on the line.


Fold over so that the seam from the side aligns well with the seam from the bottom.  Pin and sew.


Repeat for both corners of the outer fabric and both corners of the lining.

Turn bag inside out and enjoy!

boxing corners zip bag tutorial

Are you enjoying this series as much as I am?

I hope you've got great plans to make and share bags.


See the Elm Street Quilts Bag It information page for more information.


This post was sponsored by Zipit, an Etsy store.


Have a wonderful day! Patty

Monday, November 2, 2015

Bag It - Basic Zip Pouch tutorial

zip pouch tutorialYippee!!!

(This post was originally published as part of the 2015 Bag It event.)

Today we are going to learn the basics of building a simple zip pouch.   Throughout the month of November, we will build on the basics of this tutorial to create bags of different shapes and sizes.

Let's get started!!  Our basic zip pouch will finish at 4 x 6 '' - the perfect size for a smart phone or to keep things organized in your purse.


zip pouch tutorial

For this bag, we are going to use a collection of mini charm squares - any 2½'' squares will do.


You'll need the following:

  • twelve (12) squares each 2½''
  • two (2) pieces of lining fabric at 4½ x 6½''
  • four (4) pieces of fusible fleece each at  4½ x 6½''
  • one (1) zipper at least 7'' long. (NOTE - this tutorial assumes you are cutting your zipper to size as per the tutorial.  If you didn't want to do this, use a 6'' zipper.)

Assemble your squares in two different arrangements (for each side of the pouch) and sew them together.


Press each piece.  They should measure 4½ x 6½''.  Carefully place a piece of fusible fleece with the adhesive side against the wrong side of the fabric piece.  Place a second piece on top, again with the adhesive side facing down.   I find two pieces of fusible gives the bag great stability.

Iron to adhere the fusible to the fabric. And then trim as needed.


Quilt your fabric pieces. This bag was quilted at roughly 3/8''.

zip pouch tutorial

Prepare your zipper as per the instructions on this post on zipper tips and techniques.   As you can see in the photo below, we used a larger zipper and finished off the edges neatly.  You'll need a prepared zipper that measures 6'' (or slightly less) to allow for 1/4 '' on either side of the bag fabric.

Pin the zipper to the outer fabric, zipper pull side down.  See how the zipper is open?  Try and keep it that way!

zip pouch tutorial zipper attach

Place lining on top, right side of lining down so it faces the right side of the outer fabric.  Carefully sew the zipper, starting and stopping 1/4 '' from either side.


See that zipper nestled inside?


Here is what it looks like when you lay things flat.


Now repeat to attach other side.  Lay bag out flat and use pins align lining with edge of bag.

zip pouch tutorial

Top stitch around zipper.

zip pouch tutorial top stitching zipper

See how nice that looks?


Now before taking that next step, OPEN that zipper!!  You'll need it open to make sure you are able to turn the bag inside out.

Pin the outer bag fabric together and pin the lining fabric together.  The zipper will be in the middle.

See the area at the top of the photo with the two sets of double pins?  Don't sew between them - you'll be using that opening to turn your bag inside out!


The distance between the pins is roughly 2-3 ''.     Starting at one of these double pins with a back stitch to secure, carefully sew all the way around.  When you get to the transition area between the lining and the outer fabric, take it slow.  You don't want to catch the fabric zipper stop.


Here is what it will look like when you are done.


Carefully reach into that hole and start to pull the bag through.  Take it slow so nothing tears and just keep working it.  It will fit.  And if it doesn't, break out that seam ripper and take off a few stitches.


Look at how pretty everything looks!


You've two choices to sew up the hole in the lining.  A couple of small whip stitches by hand will take care of it.


You could also pin it together and sew it on your machine, being careful to backstitch on each side.


Wasn't that fun and easy?  Now it is your turn!

zip bag tutorial

Coming later this week, we'll discuss how boxing corners can change the shape and size of your bag!


Fabric credits - Moda Fig Tree mini charm pack (outer) and Moda Sweetwater Noteworthy (lining)

This post was sponsored by Zipit, an Etsy store.


Have a wonderful day! Patty