
%20(1).jpg)
My greatest fear when stitching is that I will loose my needle and someone with sit or step on it. A friend gifted me with a small needle minder one day and I've managed to collect a few more over time. In an upcoming guild meeting, we are going to put some together so I put together this quick tutorial.
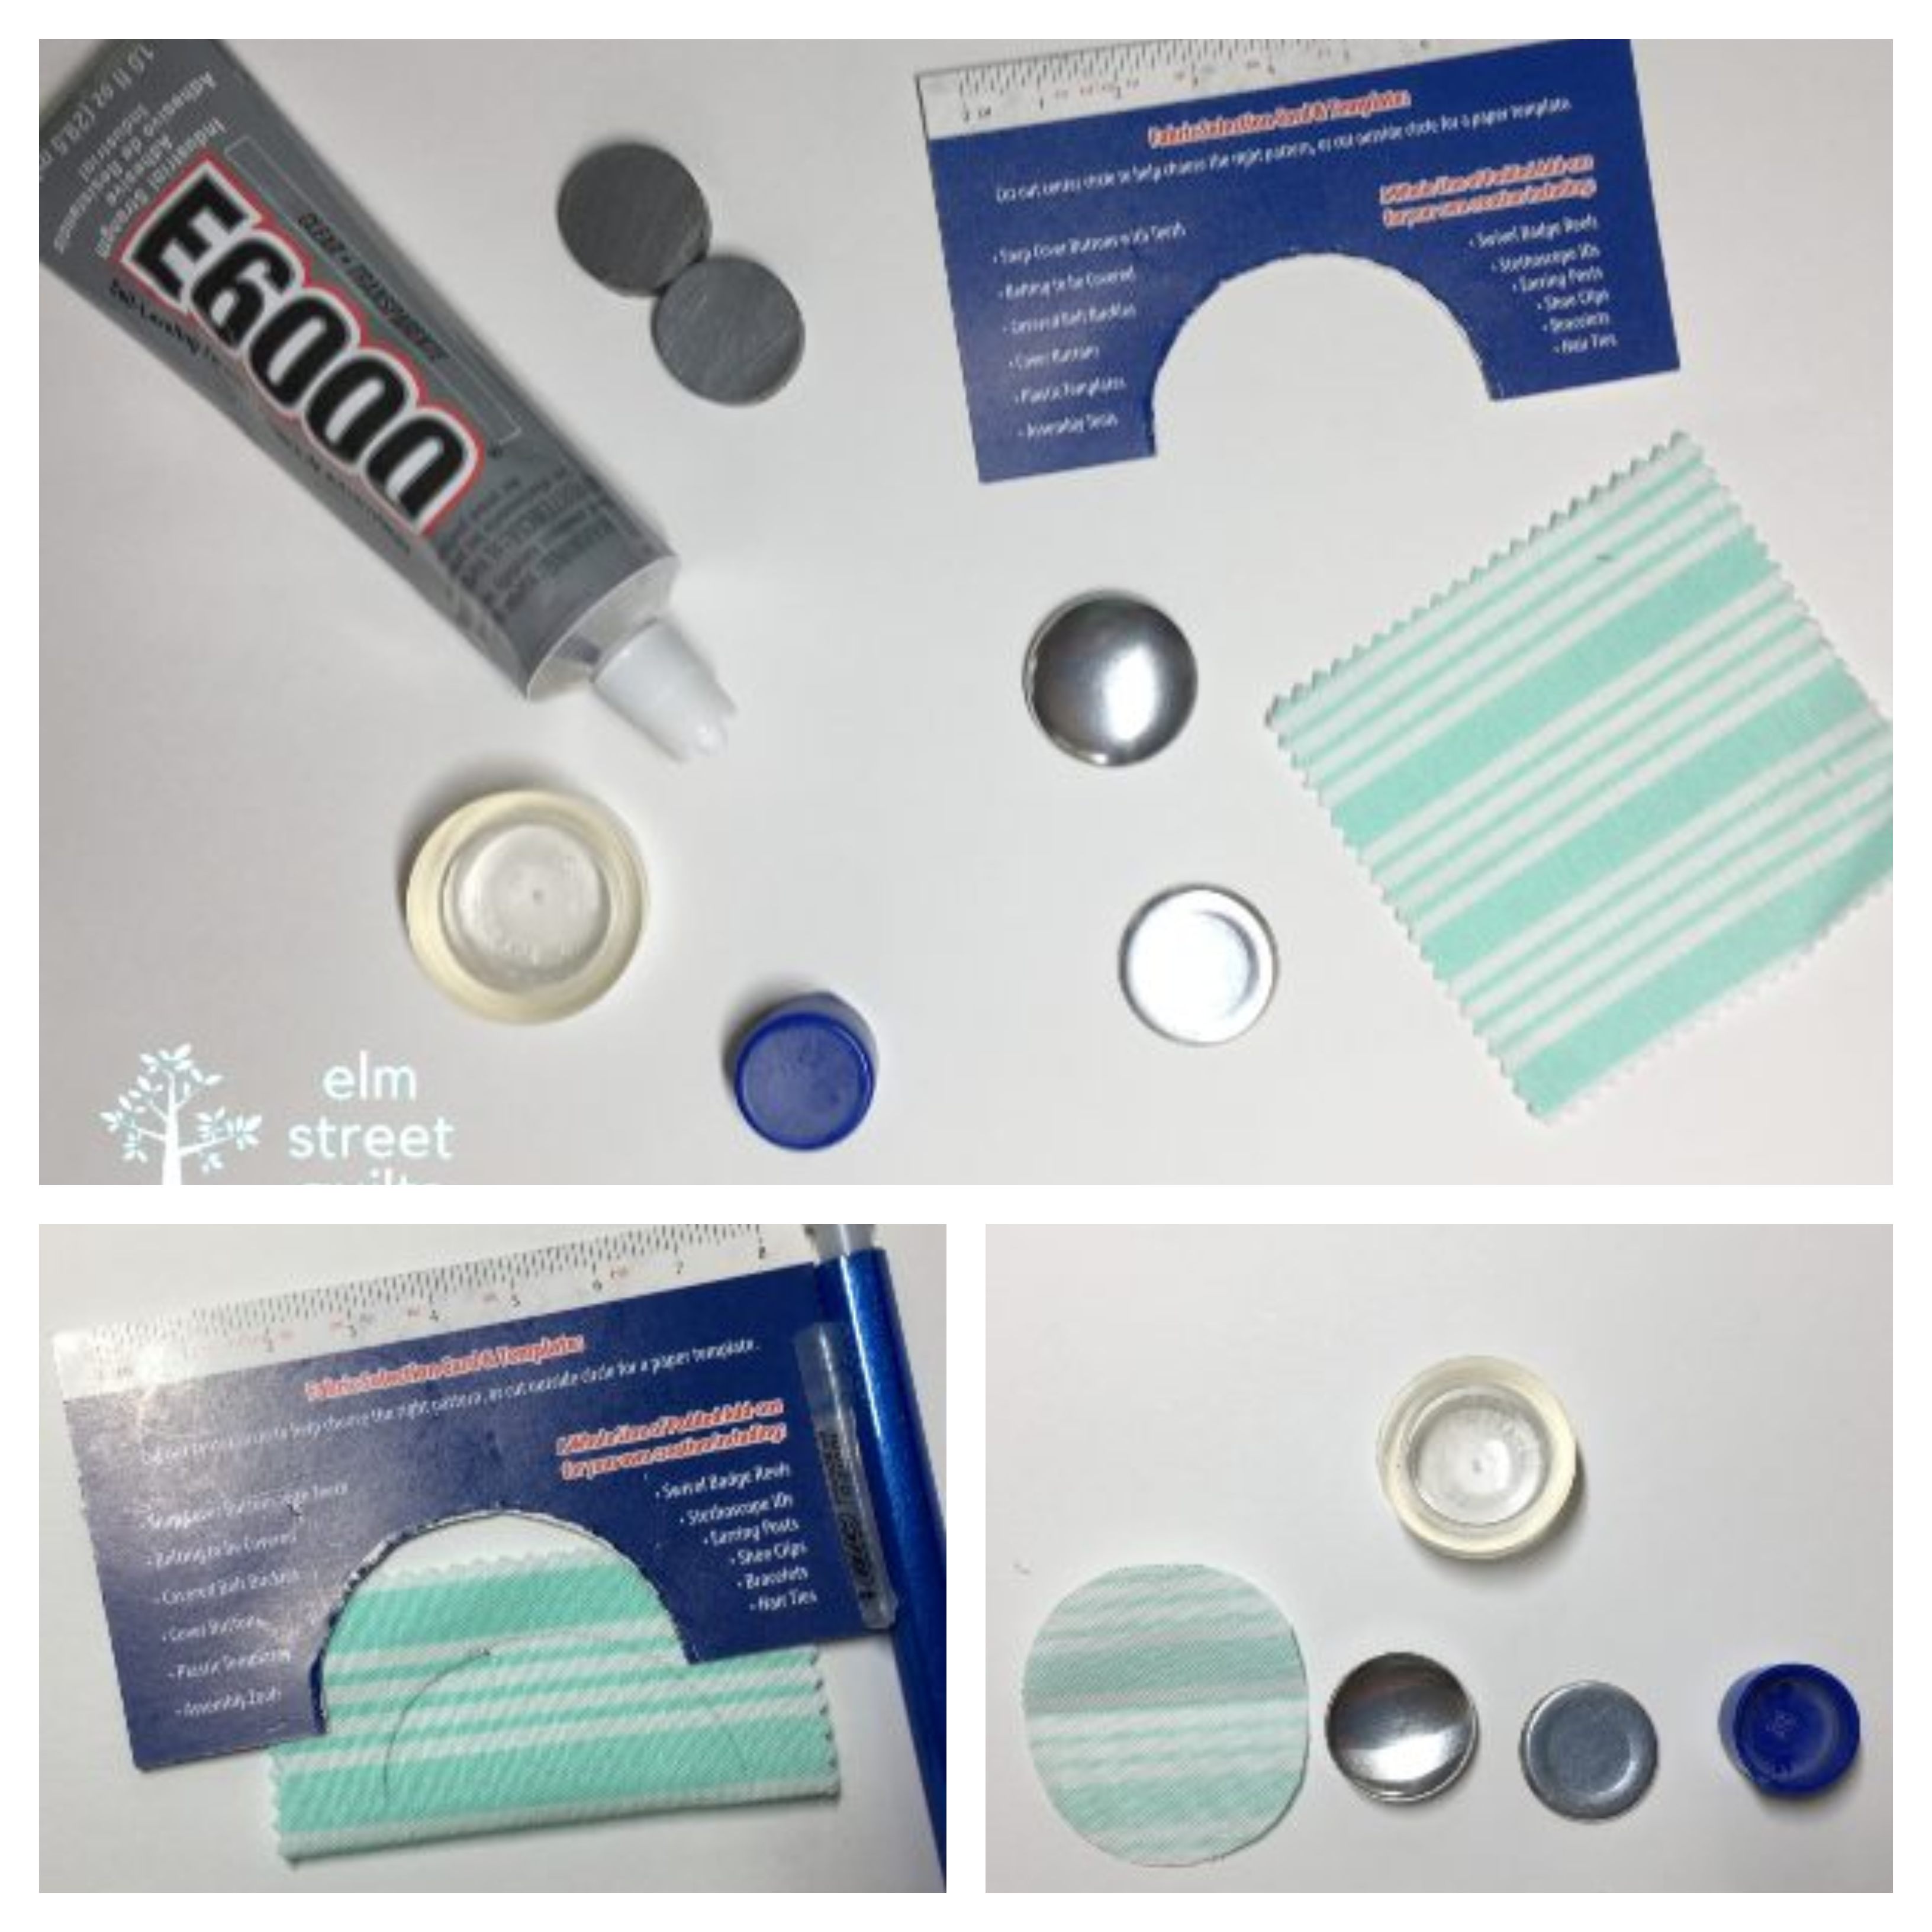
Supplies were all sourced from Amazon (affiliate links) and bought in bulk to support a guild meeting. Here is what you will need plus scraps of fabric:
- Ceramic Magnets sized 18 mm x 5 mm - These come in all different numbers of magnets so you can get what you need. Just make sure you don't get the ones with the adhesive edge.
- Buttons to cover with flat backs which includes the tool were available in the 100 count. You can also get a smaller packages like this one. (Note this small one has backs with loops and the flat backs you need for the needle minder.) The key is you need the 'tool' - more about that later - and the flat backs. The size that matches the magnets is size 36.
- E6000 Adhesive or some kind of glue
.jpg)
The button kit had a cardboard template which I place on a folded scrap and traced the half circle. To assemble the needle minder button part, you need your fabric, a button front, the flat back and the 'tool' - i.e. the round clear plastic cup and the smaller blue cup.
Center the fabric scrap right side facing down in the clear cup and place a button on top. Use the blue cup/plunger to push the button down. Wrap fabric and then tuck the button back over it. Use the blue cup/plunger to secure the back to the button and then pop it out!

Grab a magnet pair and spread adhesive on one side of one of the magnets. Gently push the blue cup/plunger into the back of the button. Let everything dry for 24 hours.
%20(1).jpg)
Now you have a new needle minder .. or maybe many more! ... ready for all your projects! Just put on magnet underneath your work and the rest of the needle minder on top and everything will stay nice and secure!
%20(1).jpg)
I love these needle minders. I think I will be making a few in the future. I will try to remind you to link up to tips and tutorials on the 22nd, this is a great one!
ReplyDeleteAs a matter of fact, my granddaughter lost one last week when she was stitching on my sofa. Haven't found it yet, nor has anyone who has sat or walked near there. I'm sure we will, though, unless she finds it at home in her jeans or shirt! That's a great tutorial. Wish I were in your guild, as I'm more likely to make one in a group than by myself!
ReplyDeleteWhat a nice accessory to have! It's wonderful that you've shared how to make them, and that you'll help your guild mates make them too. Funnily, I have been gifted several of them, and always forget to use them! Probably because: 1) sometimes I don't hoop my project; and 2) even if I hoop a project, I don't leave it in the hoop when I'm not working on it. So, it's easy to forget to put it back on the design. Have fun making more!
ReplyDeleteThank you for the great tutorial, Patty! These seem easy and fun to make!
ReplyDelete